Author: Admin234

  • Common mistakes when building a rooftop deck

    Common mistakes when building a rooftop deck

    Common mistakes when building a rooftop deck can turn what should be a relaxing retreat into a source of frustration and regret. Many homeowners envision a stunning outdoor space above their heads, but overlooking fundamental aspects like structural integrity, material selection, and regulatory compliance can lead to significant setbacks. As we explore this topic, we’ll uncover the critical errors that people often make and offer insights to ensure your rooftop deck is both beautiful and functional.

    From miscalculating weight limits to choosing inappropriate materials, the pitfalls in rooftop deck construction can greatly affect performance and safety. Addressing these common errors not only enhances the longevity of your deck but also elevates your overall outdoor experience. Let’s dive into the details that will help you avoid these mistakes and create the rooftop oasis you’ve always wanted.

    Common Structural Mistakes

    Common mistakes when building a rooftop deck

    Building a rooftop deck is an exciting venture that can enhance your living space, but common structural mistakes can lead to costly repairs or even safety hazards. Understanding these pitfalls is crucial for anyone looking to create a secure and functional structure. This section delves into prevalent errors, highlighting the significance of proper load-bearing support and effective drainage solutions.

    Discover the crucial elements that make Rooftop bar installation tips for beginners the top choice.

    Frequent Structural Errors

    Structural integrity is paramount when constructing a rooftop deck. A significant number of builders overlook proper engineering principles, leading to serious consequences. Common mistakes include inadequate support systems, poor material selection, and neglecting the weight capacity of the underlying structure. These errors can result in sagging decks, which not only diminish the aesthetic appeal but also pose safety risks to users.The foundation of a durable rooftop deck relies heavily on load-bearing support.

    The deck must distribute weight evenly to avoid undue stress on the building’s roof. Failing to account for the increased load from furniture, people, and even snow can compromise the roof’s structural integrity. It is essential to consult with structural engineers who can provide calculated designs based on local building codes and safety standards.Improper drainage solutions are another frequent oversight in rooftop deck construction.

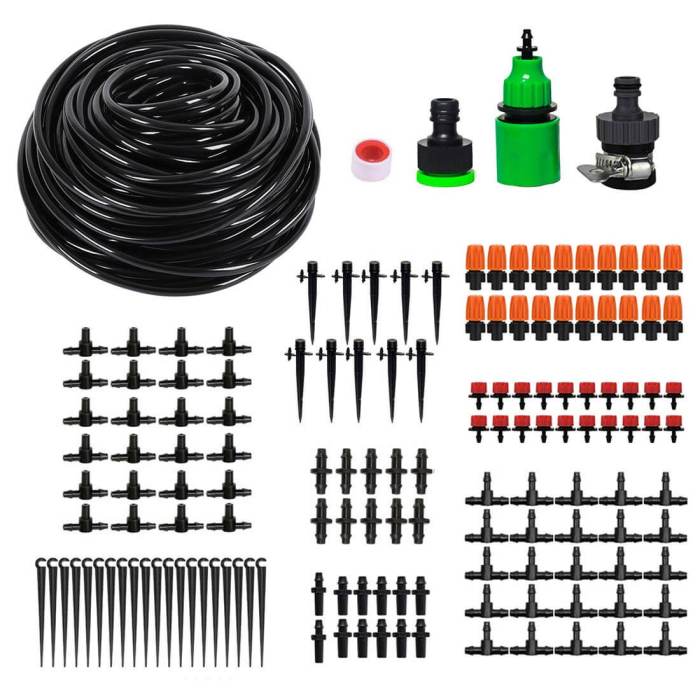
    When water is not effectively diverted away from the deck area, it can lead to pooling, which increases the risk of leaks and mold growth. Over time, moisture accumulation can deteriorate both the deck and the underlying structure, resulting in significant repair costs. Implementing proper drainage systems, such as sloped surfaces and integrated drainage channels, ensures that water flows away efficiently, extending the deck’s lifespan.

    Proper load-bearing support and effective drainage are critical for the longevity and safety of rooftop decks.

    Material Selection Errors

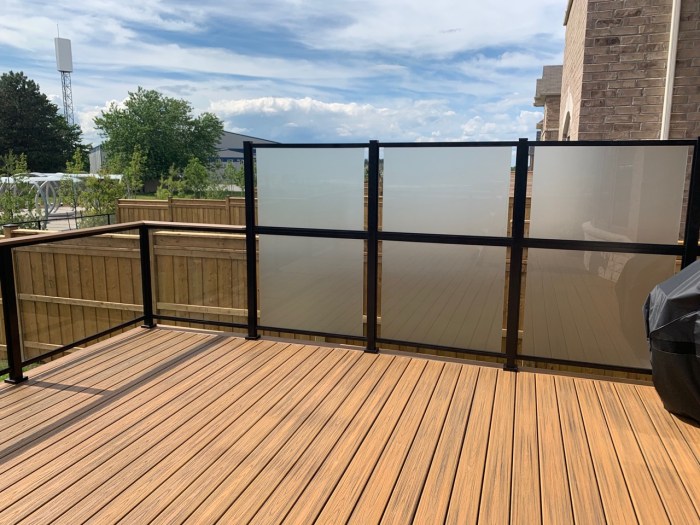
    Selecting the right materials for a rooftop deck is a critical step that can significantly impact both the aesthetic appeal and longevity of the structure. Common mistakes often arise from a lack of understanding of material properties, leading to choices that may not withstand the test of time or environmental conditions. Ensuring that the selected materials align with both functional and aesthetic needs can prevent costly repairs and enhance the overall enjoyment of the deck.When choosing materials for rooftop decks, it is essential to consider factors such as durability, maintenance requirements, and environmental compatibility.

    Two popular options are wood and composite materials, each with its own strengths and weaknesses. Understanding these differences is crucial for making an informed decision.

    Comparison of Wood vs. Composite Materials

    The choice between wood and composite materials hinges on various factors including durability, maintenance, and aesthetic preferences. Both materials have unique characteristics that can influence their performance and longevity.

    • Durability: Composite materials are generally more resistant to weathering, rot, and insect damage compared to traditional wood. For instance, while untreated wood may last about 10-15 years, high-quality composite decking can offer a lifespan of over 25 years without significant degradation.
    • Maintenance: Wood requires regular maintenance such as sealing, staining, and occasional replacements due to wear and tear. Composite materials, on the other hand, typically need only periodic cleaning to maintain their appearance, making them a low-maintenance option.
    • Aesthetics: Wood provides a natural look that many homeowners desire. It can be stained or painted in various colors. Composite decking, however, comes in an array of colors and textures that mimic wood grain, providing versatility while requiring less upkeep.

    “Durability and maintenance are the pillars of material selection for rooftop decks; choose wisely to ensure long-term satisfaction.”

    Impact of Climate on Material Choice

    Climate plays a significant role in the performance of materials used in rooftop decks. Factors such as temperature fluctuations, humidity, and exposure to UV rays can affect both wood and composite materials in different ways.

    • Temperature Fluctuations: In extreme temperature conditions, wood can expand and contract, leading to warping, cracking, or splitting. Composite materials, designed to be more stable, can withstand a broader range of temperatures without significant deformation.
    • Humidity: High humidity can lead to mold and mildew growth on wooden surfaces if not properly maintained. Composite materials are often designed to resist moisture absorption, which helps to prevent these issues.
    • UV Exposure: Prolonged exposure to sunlight can lead to fading in both wood and composite materials. However, while wood can be treated with UV protectants, composite materials typically incorporate UV-resistant technologies, allowing them to maintain their color and integrity over time.

    “Understanding climate effects on materials is essential for ensuring the longevity and performance of your rooftop deck.”

    Compliance and Regulatory Issues: Common Mistakes When Building A Rooftop Deck

    Constructing a rooftop deck is an exciting project that can enhance your living space and increase your property’s value. However, navigating the maze of compliance and regulatory requirements is essential to ensure a successful build. Understanding the necessary permits and regulations can save you from potential headaches and costly fines down the road.Compliance with local building codes is crucial for safety and legality when constructing a rooftop deck.

    Each locality has specific regulations that dictate aspects such as weight limits, materials, and design aesthetics. Failing to adhere to these codes can lead to severe consequences, including fines, forced removal of the deck, or even legal action from neighbors or local authorities. It’s important to be well-informed and proactive before beginning construction.

    Necessary Permits and Regulations

    Before starting the construction of a rooftop deck, it’s imperative to gather the necessary permits and understand the regulations that apply. Generally, the following permits may be required:

    • Building Permit: This is usually the primary permit required for any significant construction project. It ensures that the structure meets local safety and zoning laws.
    • Zoning Permit: This permit verifies that your project complies with local zoning regulations, which dictate how properties can be used and developed.
    • Special Use Permit: Some locations may require this permit if the rooftop deck is intended for commercial use or if it affects neighboring properties.
    • Electrical/Plumbing Permits: If your rooftop deck will include electrical wiring or plumbing (for water features or outdoor kitchens), additional permits are necessary.

    Consequences of Non-Compliance, Common mistakes when building a rooftop deck

    Neglecting to follow local building codes and obtaining the required permits can lead to a variety of repercussions that can complicate or even derail your project. Common consequences include:

    • Fines: Local authorities may impose hefty fines for construction without proper permits.
    • Required Removal: You may be ordered to dismantle the deck if it doesn’t adhere to local codes.
    • Legal Action: Neighbors may file complaints or lawsuits if the deck is deemed a nuisance or a violation of property lines.
    • Insurance Issues: Non-compliance may void your property insurance, leaving you financially vulnerable in the event of an accident.

    Compliance Checklist Before Construction

    Creating a compliance checklist is a practical step to ensure all necessary regulations and permits are addressed before construction begins. Follow this checklist to stay organized:

    • Research local building codes and zoning laws relevant to rooftop decks.
    • Identify and apply for necessary permits, including building and zoning permits.
    • Consult with a structural engineer or architect to ensure design compliance with regulations.
    • Check with your homeowners association (HOA) if applicable, for any additional restrictions or approvals required.
    • Prepare to submit plans and documentation for review by local authorities.
    • Schedule inspections required during the construction process to ensure compliance.

    Design Oversights

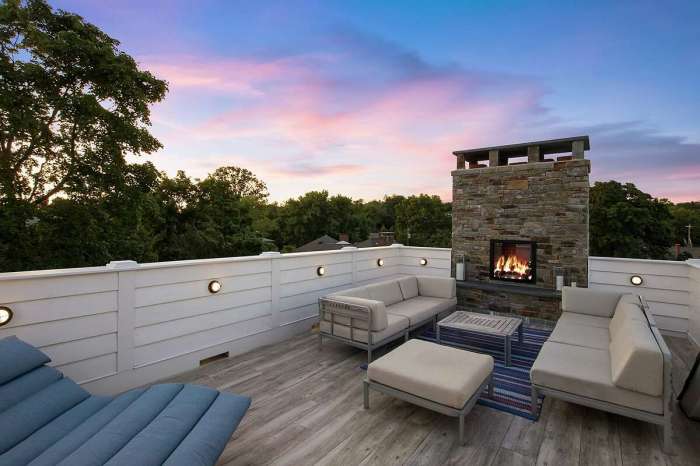
    Creating a rooftop deck is not just about aesthetics; it is crucial to ensure that safety and accessibility are prioritized in the design process. A well-planned rooftop deck can be a valuable addition to any property, providing an outdoor space for relaxation and entertainment, but overlooking design aspects can lead to serious safety hazards and functional limitations. Proper design considerations pave the way for a functional, safe, and enjoyable environment that complements the overall architecture of the building.

    Planning for accessibility in rooftop deck design is essential. Accessibility ensures that everyone, regardless of physical ability, can enjoy the space comfortably. This involves considering elements such as ramp access, wide pathways, and handrails. Additionally, safety must be integrated into the design through features like adequate lighting, sturdy guardrails, and slip-resistant surfaces.

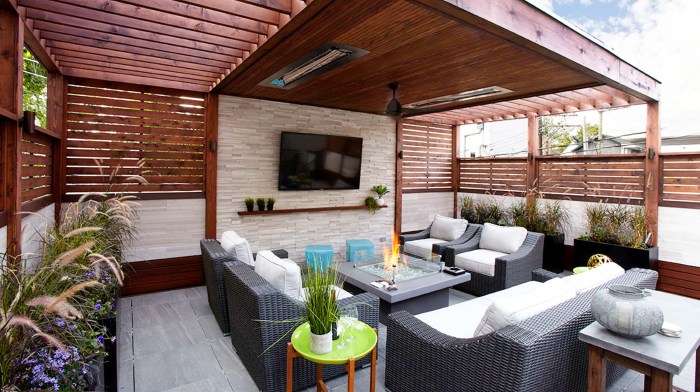
    Balancing Aesthetics and Functionality in Deck Layout

    Achieving a balance between aesthetics and functionality is critical in rooftop deck design. An attractive deck enhances the visual appeal of the property, but it must also serve practical purposes. Attention to layout can lead to an effective design that encourages usage while maintaining safety. Key considerations include:

    • Flow and Space Utilization: Analyze how the space will be used and ensure there is a seamless flow between areas such as seating, dining, and access points.
    • Furniture Arrangement: Choose furniture that complements the deck’s style while also being functional and safe, ensuring that there is sufficient space for movement.
    • Landscaping Integration: Incorporate plants and greenery that enhance the aesthetic appeal while considering their maintenance and weight on the structure.
    • Shade and Shelter: Design elements like pergolas or awnings can provide comfort from the sun while also adding to the visual interest of the deck.

    Understanding common design flaws is equally important, as they can lead to safety hazards that compromise the integrity of the rooftop deck. Examples of these flaws include:

    • Inadequate Guardrails: Insufficient height or structural integrity of guardrails can lead to accidental falls, which are a significant safety concern.
    • Poor Drainage Solutions: Design layouts that do not account for proper drainage can lead to water pooling, causing slips and structural damage over time.
    • Overcrowded Spaces: A deck that is designed without consideration for capacity can become overcrowded, leading to safety risks and discomfort.
    • Inaccessible Areas: Sections of the deck that are difficult to access can render parts of the space unusable, thus limiting the functionality of the deck.

    Taking these aspects into consideration during the design phase will mitigate the risk of common oversights and contribute to creating a rooftop deck that is both beautiful and safe for all users.

  • Cost-effective rooftop insulation options available for every budget

    Cost-effective rooftop insulation options available for every budget

    Cost-effective rooftop insulation options available reveal a wealth of opportunities for homeowners aiming to enhance energy efficiency while minimizing costs. With the increasing focus on sustainability and energy savings, selecting the right insulation can significantly impact both comfort and utility bills. This exploration delves into diverse materials, installation techniques, and the long-term savings they can provide, ensuring your rooftop is not just an overhead but a catalyst for energy efficiency.

    From traditional fiberglass to innovative reflective foams, the variety of insulation materials available presents distinct advantages and pitfalls. By understanding the energy efficiency ratings and installation methods, homeowners can make informed decisions that suit their financial and structural needs while contributing to a greener planet.

    Types of Cost-effective Rooftop Insulation

    Rooftop insulation plays a critical role in energy efficiency and maintaining comfortable indoor temperatures. Various materials are available, each with distinct properties that affect both performance and cost. Understanding these options can help homeowners make informed decisions when upgrading their insulation.When selecting insulation for rooftops, it is essential to consider the material’s thermal resistance (R-value), cost, and environmental impact. The following sections will detail several cost-effective insulation materials, their benefits and drawbacks, as well as their energy efficiency ratings.

    Fiberglass Insulation

    Fiberglass insulation is one of the most commonly used materials for rooftop insulation due to its affordability and effectiveness. It consists of tiny glass fibers that trap air, providing excellent thermal resistance.Benefits:

    • High R-value: Typically ranges from R-2.9 to R-3.8 per inch, making it effective at keeping heat in or out.
    • Cost-effective: Generally lower in price compared to other insulation types.
    • Fire-resistant: Non-combustible, adding to safety in residential buildings.

    Drawbacks:

    • Installation difficulties: Requires protective gear to avoid skin irritation and inhalation of particles.
    • Moisture retention: Can lose effectiveness if it gets wet, leading to mold growth.

    Foam Board Insulation

    Foam board insulation consists of rigid panels made from polystyrene or polyisocyanurate. It is particularly effective for flat roofs and can be installed in various thicknesses.Benefits:

    • High R-value: Typically ranges from R-3.6 to R-6.5 per inch, providing superior thermal performance.
    • Moisture-resistant: Doesn’t absorb water, making it suitable for humid environments.

    Drawbacks:

    • Cost: Generally more expensive than fiberglass insulation, especially in thicker applications.
    • Environmental impact: Manufacturing process can generate greenhouse gases.

    Reflective or Radiant Barrier Insulation

    Reflective insulation, also known as radiant barrier, is designed to reflect radiant heat away from living spaces. It is typically installed in attics to reduce cooling costs.Benefits:

    • Energy efficiency: Can reduce cooling costs by up to 20% in hot climates, particularly when installed in the roof’s rafters.
    • Lightweight: Easy to install without adding significant weight to the roof structure.

    Drawbacks:

    • Limited effectiveness: Works best in hot climates and may not be as effective in cooler regions.
    • Cost: Initial installation costs can be higher than traditional insulation types.

    Cellulose Insulation

    Cellulose insulation is made from recycled paper products treated with fire retardants. It offers a sustainable option for those looking to insulate their roofs.Benefits:

    • Eco-friendly: Made from recycled materials, reducing landfill waste.
    • Good thermal performance: R-values range from R-3.1 to R-3.7 per inch, comparable to fiberglass.

    Drawbacks:

    • Settling: Over time, cellulose can settle and lose its effectiveness unless properly installed.
    • Moisture issues: Can absorb moisture, leading to potential mold problems if not adequately ventilated.

    Mineral Wool Insulation

    Mineral wool insulation, also known as rock wool, is made from natural rock or recycled slag. It is known for its soundproofing qualities and fire resistance.Benefits:

    • Fire resistant: Can withstand high temperatures, making it a safe option for rooftops.
    • Soundproofing: Provides excellent acoustic insulation, adding to comfort.

    Drawbacks:

    • Cost: Generally more expensive than fiberglass and cellulose options.
    • Installation complexity: May require professional installation due to weight and handling requirements.

    Choosing the right insulation material for your rooftop can significantly impact energy efficiency, comfort, and overall costs. Evaluating the benefits and drawbacks of each type helps ensure a suitable selection for your needs.

    Installation Methods for Rooftop Insulation

    Cost-effective rooftop insulation options available

    Rooftop insulation is essential for maintaining energy efficiency and comfort in buildings. Understanding the different installation methods can assist homeowners and professionals alike in selecting the best approach for their specific needs. Various methods exist depending on the type of insulating material chosen, and each comes with its own set of advantages and challenges.

    Installation Methods for Different Types of Rooftop Insulation

    The installation methods for rooftop insulation vary according to the type of insulation being used. Below are some common roofing insulation materials and their respective installation techniques.

    • Fiberglass Batt Insulation: This method involves laying pre-cut fiberglass batts between the rafters or joists. The batts need to be snugly fitted without gaps to ensure maximum thermal performance. Typically, a vapor barrier is installed on the warm side of the insulation to prevent moisture buildup.
    • Spray Foam Insulation: Spray foam is applied as a liquid that expands and solidifies into a dense foam. This method requires specialized equipment for application. It’s essential to wear protective gear and ensure proper ventilation during installation due to the chemicals involved.
    • Rigid Foam Board Insulation: Rigid foam boards can be installed as continuous sheathing over the roof deck. The boards are joined with adhesive or mechanical fasteners and sealed at the seams with tape to minimize thermal bridging.
    • Mineral Wool or Rock Wool Insulation: Similar to fiberglass, mineral wool batts can be installed between joists. They are known for their fire-resistant properties and sound absorption capabilities.
    • Reflective or Radiant Barrier Insulation: This type of insulation works best in hot climates. It is typically installed on the underside of the roof deck to reflect radiant heat away from the living space. Installation involves attaching the barrier directly to the roof frame.

    Step-by-Step Guide for DIY Installation, Cost-effective rooftop insulation options available

    Installing rooftop insulation can be done by homeowners willing to put in the effort. Here is a general guide for DIY installation:

    1. Preparation

    Inspect the roof for any damage and repair as needed.

    Gather all necessary tools and materials, including safety gear, insulation, a utility knife, measuring tape, and adhesive or fasteners.

    2. Measure and Cut

    Further details about How to design a rooftop garden effectively is accessible to provide you additional insights.

    Measure the spaces where insulation will be installed to ensure precise cutting. Use a utility knife to cut the insulation to the required sizes.

    3. Install the Insulation

    For batts, fit them snugly between rafters or joists. Ensure there are no gaps. For rigid boards, apply adhesive or use fasteners to secure them to the roof deck. Seal any joints with tape.

    4. Add a Vapor Barrier

    Install a vapor barrier on the warm side if required, ensuring it covers all insulation areas.

    5. Final Checks

    Inspect the installation for gaps or unsealed areas and address any issues.

    Professional Installation Steps

    When opting for professional installation, understanding the process can provide clarity:

    1. Initial Consultation

    A contractor evaluates the roof’s condition, insulation needs, and recommends appropriate materials and methods.

    2. Preparation and Safety Measures

    Professionals prepare the site, ensuring safety protocols are in place, which may include scaffolding and safety harnesses.

    3. Material Delivery and Inspection

    Insulation materials are delivered and inspected for quality before installation begins.

    4. Installation

    Professionals proceed with the chosen insulation method, ensuring compliance with local building codes and standards.

    5. Final Inspection and Cleanup

    After installation, a thorough inspection is conducted to ensure proper application, followed by cleanup of the work area.

    Safety Precautions and Best Practices

    Installing rooftop insulation can involve risks, making safety precautions essential. Adhering to best practices ensures a successful and safe installation process.

    • Use Personal Protective Equipment (PPE): Always wear gloves, masks, and eye protection when handling insulation materials, especially spray foam.
    • Ensure Proper Ventilation: If using materials that emit fumes, ensure the area is well-ventilated to prevent inhalation of harmful substances.
    • Check Weather Conditions: Avoid installation during inclement weather to prevent accidents or the material from being compromised.
    • Follow Manufacturer Instructions: Adhering to manufacturer guidelines is crucial for the effective performance of insulation materials.
    • Employ Safe Ladder Practices: When working at heights, ensure ladders are stable and positioned correctly, and never overreach.

    Comparison of Costs for Different Insulation Options

    Rooftop insulation serves as a critical investment for enhancing energy efficiency and comfort within a building. Understanding the costs associated with various insulation materials helps homeowners and builders make informed decisions that align with budget constraints while maximizing long-term savings.The cost of insulation varies significantly based on the materials chosen, their R-values, and installation requirements. Below is a breakdown of common insulation materials alongside their average costs per square foot:

    Cost Breakdown of Popular Insulation Materials

    When evaluating the cost-effectiveness of different insulation options, it’s essential to consider both upfront costs and long-term savings. The following table provides an overview of popular insulation materials, including their estimated costs and potential long-term savings.

    Insulation Material Cost per Square Foot Average R-Value Estimated Annual Energy Savings
    Fiberglass Batts $0.50 – $1.00 2.9 – 4.3 $100 – $200
    Foam Board $1.00 – $3.00 5.0 – 6.5 $150 – $300
    Spray Foam $2.50 – $3.50 6.0 – 7.0 $200 – $400
    Mineral Wool $1.00 – $1.50 3.0 – 4.0 $120 – $250
    Cellulose $0.75 – $1.50 3.5 – 4.0 $100 – $220

    Evaluating these materials allows for a clear comparison of their cost-effectiveness, especially regarding their long-term benefits. For instance, while spray foam has a higher initial cost, its superior R-value leads to greater energy savings over time.

    Financing Options for Installing Rooftop Insulation

    Financing rooftop insulation installation can ease the financial burden associated with upfront costs. Several options are available to homeowners and property owners looking to invest in insulation:

    Home Improvement Loans

    Many banks and credit unions offer loans specifically for home renovations, including insulation upgrades. These loans typically have favorable terms and can cover the total cost of the project.

    Government Incentives

    Various federal and local programs provide tax credits or rebates for energy-efficient home improvements. Homeowners should research available incentives in their area to take advantage of these financial benefits.

    Energy-Efficiency Financing Programs

    Some utility companies offer financing options for energy efficiency improvements, often with low-interest rates or even no-interest loans. These programs are designed to encourage homeowners to invest in energy-saving upgrades.

    Personal Savings or Credit Cards

    Utilizing personal savings or credit card financing can be a quick way to cover initial costs but should be approached with caution to avoid high-interest debt.By exploring these financing options, homeowners can mitigate the costs associated with installing rooftop insulation, making it a more feasible investment for long-term energy efficiency and savings.

    Maintenance and Longevity of Rooftop Insulation: Cost-effective Rooftop Insulation Options Available

    Proper maintenance of rooftop insulation is crucial for ensuring its effectiveness and longevity. Neglecting this aspect can lead to various issues, including reduced thermal performance and increased energy costs. Understanding how to care for different types of insulation and recognizing the factors that impact their lifespan can prevent costly repairs and replacements down the line.The longevity of rooftop insulation is influenced by several factors, including the material composition, environmental conditions, and installation quality.

    Generally, high-quality insulation materials can last anywhere from 20 to 50 years, but regular maintenance is key to maximizing this lifespan. Routine inspections and timely repairs can mitigate common problems associated with rooftop insulation, ultimately extending its useful life.

    Best Practices for Maintaining Different Types of Insulation

    Different types of rooftop insulation require specific maintenance strategies to ensure their performance. Implementing these best practices can significantly contribute to the longevity of the insulation:

    • Fiberglass Insulation: Keep the area around the insulation dry and free of debris. Inspect for moisture accumulation, which can lead to mold growth and reduced effectiveness.
    • Foam Insulation: Regularly check for cracks or deterioration. Seal any gaps to prevent air leaks and moisture penetration, which can compromise insulation integrity.
    • Reflective Insulation: Ensure that the reflective surfaces are clean and free of dust or debris. This maximizes their efficiency in reflecting heat away from the building.
    • Spray Foam Insulation: Monitor for signs of wear or damage on the foam layer. Any exposed areas should be reapplied to maintain a continuous barrier against heat transfer.

    Expected Lifespan and Factors Affecting Longevity

    The lifespan of rooftop insulation varies based on several factors. Understanding these elements can help property owners make informed choices regarding insulation maintenance and replacement.

    Material Quality

    High-quality insulation materials, like closed-cell spray foam, generally last longer than lower-quality variants.

    Environmental Conditions

    Areas with extreme weather conditions, including heavy rainfall or constant exposure to sunlight, can shorten the lifespan of insulation materials.

    Installation Quality

    Proper installation is essential. Poorly installed insulation can lead to gaps and air leaks, diminishing effectiveness and lifespan.

    Maintenance Practices

    Regular checks and prompt repairs can significantly enhance the durability of insulation. Neglect can lead to various issues that may require complete replacement.

    Common Problems and Their Solutions Related to Rooftop Insulation

    Addressing common problems associated with rooftop insulation is essential for maintaining its performance. Here are typical issues and their corresponding solutions:

    • Moisture Accumulation: This often leads to mold and reduced insulation effectiveness. To solve this, ensure proper ventilation and address any roof leaks immediately.
    • Pest Infestations: Rodents and insects may compromise insulation materials. Regularly inspect for signs of pests and consider installing barriers or hiring pest control services as needed.
    • Thermal Bridging: This occurs when heat bypasses insulation through structural elements. To mitigate this issue, ensure that insulation is continuous and properly installed around all structural elements.
    • Deterioration of Materials: Over time, certain materials may degrade. Regular inspections can help identify deterioration early, allowing for timely repairs or replacements.
  • Rooftop privacy solutions for residential areas enhancing comfort

    Rooftop privacy solutions for residential areas enhancing comfort

    Rooftop privacy solutions for residential areas have become essential in today’s urban living landscape, providing not just a shield from prying eyes but also a sanctuary for relaxation and personal enjoyment. As cities expand and dwellings rise vertically, the need for private outdoor spaces has intensified, significantly influencing the lifestyle and comfort of residents. By creating a secluded rooftop environment, homeowners can experience a unique blend of tranquility and connection with nature, even amidst the hustle and bustle of urban life.

    This exploration into rooftop privacy solutions delves into the various types of materials and designs available for enhancing privacy, from sleek screens to lush greenery. We will also consider the practical aspects of design and installation, ensuring that these solutions not only meet aesthetic desires but also comply with local regulations. Maintenance tips will be highlighted to help homeowners keep their private retreats in pristine condition year-round.

    Importance of Rooftop Privacy

    In urban residential settings, the integration of rooftop privacy solutions has emerged as a crucial element for homeowners seeking a sanctuary amidst the hustle and bustle of city life. Rooftop privacy not only enhances the aesthetic appeal of a property but also significantly contributes to the overall quality of life for its residents. With limited outdoor space in densely populated areas, having a private rooftop can be a rare gem that provides residents with their own personal retreat.Rooftop privacy solutions play a vital role in creating a comfortable living environment.

    In an era where urban living often means close proximity to neighbors, privacy can greatly affect how residents experience their home. The ability to enjoy outdoor spaces without the intrusion of onlookers allows individuals and families to relax and engage in activities freely. Moreover, the sense of seclusion fosters a more inviting atmosphere for social gatherings, enhancing the overall lifestyle of residents.

    Emotional Benefits of Private Rooftop Spaces

    Private rooftop areas contribute significantly to emotional well-being by providing a serene environment that allows for personal reflection and relaxation. When individuals have access to a secluded outdoor space, they often experience a range of emotional benefits, including reduced stress and increased happiness. This space becomes an extension of home, enabling residents to disconnect from the outside world.Several key emotional benefits can be derived from having a private rooftop space:

    • Enhanced Relaxation: A secluded rooftop can serve as a peaceful retreat, allowing residents to unwind after a long day. The ability to enjoy a quiet moment outdoors can significantly improve mental clarity and reduce anxiety.
    • Increased Sense of Ownership: Having a private outdoor area fosters a feeling of belonging and ownership, enhancing one’s connection to their home and community.
    • Improved Social Interactions: A private rooftop space encourages gatherings with friends and family, creating memorable experiences in a comfortable setting away from public view.
    • Personalization Opportunities: Homeowners can cultivate their rooftop as an extension of their personal style, whether through gardening, seating arrangements, or decorative elements, further enhancing their emotional attachment to the space.

    The presence of rooftop privacy solutions thus emerges as a pivotal factor in cultivating a harmonious urban living experience. By not only providing physical barriers but also fostering emotional wellness, these solutions transform rooftops into cherished sanctuaries that uplift the quality of life for residents in urban settings.

    Types of Rooftop Privacy Solutions

    Rooftop privacy solutions for residential areas

    Rooftop privacy solutions are essential for enhancing the comfort and aesthetics of outdoor spaces in residential areas. By utilizing various materials and design styles, homeowners can effectively shield themselves from unwanted views while creating a stylish environment. This section will delve into the types of rooftop privacy solutions, examining materials, design styles, and the effectiveness of these solutions across different climates.

    Materials Used in Rooftop Privacy Solutions

    The choice of materials for rooftop privacy solutions can significantly influence both functionality and visual appeal. Here are some commonly used materials:

    • Privacy Screens: Typically made from wood, composite materials, or metal, privacy screens can block sightlines while providing a modern touch. For example, aluminum slat screens are popular for their durability and sleek appearance.
    • Walls: Solid walls, whether built from brick, stone, or wood, offer robust privacy and can be painted or textured for aesthetic considerations. A brick wall can provide a rustic feel, while a smooth wooden wall can enhance a contemporary look.
    • Greenery: Living walls or tall planters filled with shrubs and vines not only provide privacy but also improve air quality. For instance, using climbing plants like ivy can create a natural privacy barrier that is both effective and visually appealing.

    Design Styles for Rooftop Privacy, Rooftop privacy solutions for residential areas

    Rooftop privacy solutions can be tailored to various design aesthetics, enhancing the overall look of the space. Different styles include:

    • Contemporary: This style emphasizes minimalism with clean lines and modern materials. Features may include sleek metal panels or frameless glass barriers that provide unobtrusive privacy.
    • Rustic: Incorporating natural elements, rustic designs often use reclaimed wood and stone. A wooden trellis with climbing plants exemplifies this style, creating an inviting and warm atmosphere.
    • Modern: With a focus on bold shapes and innovative materials, modern designs might consist of geometric screens or glass barriers integrated with metal frames. These designs often prioritize both function and style.

    Effectiveness of Privacy Solutions in Various Climates

    Different climates can affect the performance and longevity of rooftop privacy solutions. Consider the following comparisons:

    Climate Type Recommended Privacy Solution Effectiveness
    Hot and Dry Wood or Composite Screens These materials withstand high temperatures and resist warping, making them ideal for sunny areas.
    Humid and Tropical Metal Walls with Anti-Corrosion Coating Metal solutions can provide robust privacy while being treated to resist rust and decay in damp conditions.
    Cold and Snowy Solid Walls with Insulation Insulated walls offer privacy while helping to retain heat, which is beneficial in colder climates.

    “Choosing the right rooftop privacy solution involves considering both aesthetic preferences and the local climate to ensure durability and effectiveness.”

    Learn about more about the process of Ideas for rooftop party decorations and themes in the field.

    Design and Installation Considerations

    Rooftop privacy solutions for residential areas

    Designing and installing rooftop privacy solutions requires careful planning and execution to ensure effectiveness and compliance with local regulations. As urban living spaces become denser, creating a private and peaceful environment on rooftops has become increasingly essential. Understanding the nuances of design and installation can lead to successful outcomes that enhance both aesthetics and functionality.

    Guidelines for Designing Effective Rooftop Privacy Solutions

    To create an effective rooftop privacy solution, several design guidelines should be followed. These considerations not only enhance the privacy aspect but also ensure that the structures blend well with the existing environment.

    • Assess the Environment: Before designing, evaluate the surrounding buildings, landscape, and views to determine the level of privacy needed.
    • Material Selection: Choose materials that provide durability and privacy, such as wood, metal, or composite materials, while also considering the visual appeal.
    • Height and Scale: Ensure that the height of the privacy structure is sufficient to block views from neighboring buildings without overwhelming the rooftop space.
    • Aesthetic Integration: Select designs that complement the architecture of the building and the surrounding area, enhancing overall visual appeal.
    • Accessibility: Design solutions that allow for easy access to the rooftop while maintaining privacy, ensuring that pathways and entry points are unobtrusive.

    Common Challenges in Installation of Rooftop Privacy Structures

    The installation of rooftop privacy solutions can present several challenges that need to be addressed effectively to ensure successful implementation. Common challenges include:

    • Weight Restrictions: Rooftops may have weight limitations based on the building’s structure, necessitating careful planning of materials and designs to avoid overloading.
    • Weather Conditions: Installation may be hampered by adverse weather, requiring scheduling flexibility and consideration of seasonal impacts on construction.
    • Access Issues: Gaining access to rooftops can be complex, particularly in urban settings, where the use of cranes or scaffolding may be necessary.
    • Permitting Processes: Navigating local building codes and securing necessary permits can delay the installation process, emphasizing the need for thorough planning.

    Importance of Adhering to Local Building Codes

    Adhering to local building codes when installing rooftop privacy solutions is crucial for several reasons. Compliance ensures safety, legality, and acceptance within the community.

    • Safety Regulations: Building codes are designed to ensure the safety and structural integrity of constructions, preventing potential hazards from becoming liabilities.
    • Community Standards: Following local regulations maintains the aesthetic and functional standards of the neighborhood, fostering positive community relations.
    • Avoiding Fines: Non-compliance can lead to fines or orders to dismantle structures, resulting in wasted resources and time.
    • Insurance Implications: Insurance policies may require adherence to building codes, and non-compliance could jeopardize coverage in case of damage or injury.

    Understanding the design and installation considerations for rooftop privacy solutions not only ensures effective structures but also enhances the overall living experience in urban environments.

    Maintenance and Upkeep of Rooftop Privacy Solutions: Rooftop Privacy Solutions For Residential Areas

    Rooftop privacy solutions for residential areas

    Maintaining rooftop privacy solutions is essential for ensuring their longevity and effectiveness. Regular upkeep not only preserves the aesthetics of your outdoor space but also enhances the functionality of these structures. By adhering to best practices and seasonal maintenance tips, homeowners can protect their investments while maximizing the privacy and enjoyment of their rooftops.

    Best Practices for Maintaining Rooftop Privacy Solutions

    Understanding the specific maintenance needs of different rooftop privacy solutions is crucial for their sustained performance. The following best practices should be followed to ensure proper upkeep:

    • Regular Inspections: Conduct thorough inspections at least twice a year to identify any wear or damage. Look for rust, cracks, or loose fittings, particularly in metal or wooden structures.
    • Cleaning: Clean surfaces regularly to prevent the build-up of dirt, algae, and mildew. Different materials require varying cleaning methods; for instance, wood should be washed with mild soap and water, while metal may benefit from specialized cleaners.
    • Protective Treatments: Apply protective coatings or sealants to materials like wood and metal to prevent weather-related damage. For wooden structures, consider applying stains or sealants every couple of years.
    • Vegetation Management: For living walls or green privacy screens, ensure regular pruning and watering to maintain health and appearance. Monitor for pests or diseases that could compromise plant health.

    Seasonal Maintenance Tips

    Seasonal changes can significantly impact the condition of rooftop privacy solutions. Implementing targeted maintenance practices can help extend their lifespan:

    • Spring: Inspect for winter damage, clean surfaces, and apply fresh protective treatments. This is also an ideal time to replace any dead plants in living walls.
    • Summer: Monitor plants for hydration, especially during hot spells. Regular cutting back can promote growth and maintain aesthetic appeal. Ensure that drainage systems are functioning properly to prevent water buildup.
    • Autumn: Prepare privacy structures for winter by clearing fallen leaves and debris. Assess any paint or sealant wear and apply as needed. This is also a good time to reinforce structures against winter storms.
    • Winter: Remove snow accumulation on roofs to prevent structural stress. Monitor for ice damage, particularly for wooden structures. Ensure that heating systems don’t damage plants on green screens.

    Upgrades and Enhancements for Existing Structures

    Considering potential upgrades can enhance both the functionality and aesthetics of rooftop privacy solutions. The following options are worth exploring:

    • Adding Lighting: Install ambient lighting or accent lights to enhance the nighttime appeal and safety of rooftop spaces.
    • Integrating Smart Technology: Incorporate sensors and automated systems to adjust blinds or screens based on sunlight or outdoor conditions, improving both privacy and energy efficiency.
    • Improving Vegetation: Replace existing plants with drought-resistant varieties or native species that require less maintenance and provide better privacy.
    • Structural Modifications: Consider adding trellises or pergolas that can support climbing plants, offering additional privacy and a more natural aesthetic.
  • Rooftop irrigation systems for efficient watering made simple

    Rooftop irrigation systems for efficient watering made simple

    Rooftop irrigation systems for efficient watering have emerged as a transformative solution for urban gardening, allowing city dwellers to harness the potential of their rooftops. These innovative systems not only optimize water usage but also contribute to the green aesthetic of urban landscapes. With growing interest in sustainable living, understanding the various types of rooftop irrigation systems available becomes essential for anyone looking to cultivate their own green oasis above the concrete jungle.

    By embracing rooftop irrigation, urban gardeners can effectively manage their water supply while enjoying the multitude of benefits that come with efficient watering methods. From drip systems to automated sprinklers, each type of irrigation system offers unique advantages tailored to diverse plant needs and environmental conditions. The increasing popularity of these systems reflects a broader movement towards sustainable urban agriculture, combining practicality with eco-consciousness.

    Introduction to Rooftop Irrigation Systems

    Rooftop irrigation systems represent an innovative approach to urban gardening, allowing city dwellers to cultivate plants in limited spaces while maximizing water efficiency. These systems cater to a growing need for sustainable gardening practices in urban environments, where traditional gardening methods may not be feasible due to space and resource constraints.Efficient watering is crucial for urban gardening as it directly impacts plant health and growth.

    With the rising population density in cities, finding effective ways to manage water resources becomes imperative. Rooftop irrigation systems not only help conserve water but also provide a means to utilize rainwater and reduce runoff. This method supports various types of vegetation, from ornamental plants to edible gardens, promoting biodiversity and enhancing the urban landscape.

    Find out further about the benefits of Rooftop bar installation tips for beginners that can provide significant benefits.

    Types of Rooftop Irrigation Systems

    Understanding the various types of rooftop irrigation systems is essential for selecting the right one for specific gardening needs. Each system has distinct advantages and is suited for different plant types and environmental conditions. The primary types include drip irrigation, soaker hoses, and sprinkler systems.

    • Drip Irrigation: This system delivers water directly to the plant roots through a network of tubing and emitters, minimizing water waste. It is particularly effective for drought-resistant plants and allows for precise control over water application.
    • Soaker Hoses: Made of porous material, soaker hoses allow water to seep slowly along their length, providing moisture directly to the soil. This method is ideal for rows of plants and allows for even hydration without the risk of overwatering.
    • Sprinkler Systems: These systems mimic rainfall, distributing water over a larger area. While they are beneficial for wide garden spaces, they require careful scheduling to avoid water loss through evaporation and runoff.

    Utilizing rooftop irrigation systems can lead to improved water conservation efforts. The choice of system depends on several factors, including the type of plants being grown, available space, and water supply.

    “Rooftop irrigation systems optimize water usage, ensuring that urban gardens thrive even in challenging climates.”

    In urban settings, where every drop of water counts, selecting the right irrigation system can significantly enhance the efficiency of watering practices. By making informed choices, urban gardeners can create flourishing green spaces that contribute positively to their surroundings.

    Design and Installation of Rooftop Irrigation Systems

    Rooftop irrigation systems for efficient watering

    Designing and installing a rooftop irrigation system is a critical step toward achieving efficient and sustainable watering for urban landscapes. These systems require careful planning and execution to optimize water use and promote healthy plant growth while preventing structural damage to the building. The design process involves several key steps that must be followed for successful implementation. Each step ensures that the irrigation system is tailored to the specific needs of the rooftop garden and complies with safety and regulatory standards.

    Steps in Designing a Rooftop Irrigation System, Rooftop irrigation systems for efficient watering

    The design of a rooftop irrigation system incorporates various factors including plant selection, water source, and placement of irrigation components. The following steps are essential in the design process:

    1. Assess the Rooftop Space: Evaluate the area available for planting, considering sun exposure, wind patterns, and existing structural elements.
    2. Select Appropriate Plants: Choose drought-tolerant and native vegetation that can thrive in the rooftop environment, optimizing water usage.
    3. Determine Water Source: Identify the most suitable water source, which could include rainwater harvesting, municipal water supply, or greywater recycling.
    4. Design Irrigation Layout: Plan the layout of drip lines, soaker hoses, or sprinkler systems based on plant placement and water needs.
    5. Calculate Water Requirements: Estimate the water needs of all plants, adjusting for factors such as plant maturity and seasonal changes.

    Materials and Tools Required for Installation

    The successful installation of a rooftop irrigation system relies on the use of specific materials and tools that ensure durability and efficiency. A comprehensive list includes:

    “Using high-quality materials and proper tools is essential for the long-term functionality of the irrigation system.”

    • PVC or Polyethylene Tubing: Used for water distribution and connecting components.
    • Emitter or Sprinkler Heads: Essential for delivering water directly to plants.
    • Filters: To prevent clogging and ensure clean water flow.
    • Pressure Regulators: Maintain optimal water pressure for efficient irrigation.
    • Timers and Controllers: Automate watering schedules based on weather conditions.
    • Drills and Wrenches: Necessary for assembling and attaching components securely.
    • Leveling Tools: Ensure proper alignment for drainage and water flow.

    Considerations for Effective Drainage and Water Management

    Effective drainage and water management are critical to prevent water pooling and potential damage to the rooftop structure. Factors to consider include:

    “Proper drainage planning ensures the longevity of both the irrigation system and the building structure.”

    When planning for drainage, it is essential to keep the following points in mind:

    • Slope and Grading: Design the rooftop to allow for adequate slope, directing water toward designated drainage points.
    • Drainage Systems: Install proper drainage systems like scuppers or downspouts to handle excess water efficiently.
    • Soil Type and Depth: Consider soil characteristics that affect water retention and drainage capabilities.
    • Maintenance Access: Ensure that drainage systems are easily accessible for regular cleaning and maintenance.
    • Monitor Water Levels: Implement systems to regularly check moisture levels, preventing overwatering or underwatering.

    Maintenance and Optimization of Rooftop Irrigation Systems: Rooftop Irrigation Systems For Efficient Watering

    Rooftop irrigation systems for efficient watering

    Rooftop irrigation systems, while designed for efficiency, require consistent maintenance and optimization to function effectively. Regular upkeep not only extends the lifespan of the system but also ensures that plants receive the adequate moisture they need for healthy growth. This section Artikels essential maintenance techniques, troubleshooting common issues, and provides guidance on optimizing watering schedules tailored to various plant types.

    Regular Maintenance Techniques

    Implementing a routine maintenance schedule is vital for the longevity and efficiency of rooftop irrigation systems. Regular checks not only help in identifying potential issues but also improve the overall functionality of the system. Key maintenance practices include:

    • Inspecting Components: Periodically examine hoses, emitters, and connectors for clogs or leaks. Ensuring that all components are intact will prevent water wastage and ensure uniform water distribution.
    • Cleaning Filters: Clean or replace filters regularly to prevent debris buildup, which can obstruct water flow and cause system pressure issues.
    • Checking Water Pressure: Regularly monitor water pressure levels. Low pressure may indicate clogs, while high pressure can damage system components.
    • Seasonal Adjustments: Adjust the watering schedule based on seasonal changes. As temperatures rise or fall, the amount of water needed by plants will vary.

    Common Issues and Troubleshooting Methods

    Even well-maintained rooftop irrigation systems may encounter issues that can affect their performance. Understanding common problems and their solutions is essential for effective troubleshooting.

    • Clogged Emitters: Clogs are a frequent issue in irrigation systems. To resolve this, remove and clean the emitters with water or a small brush. If clogs persist, consider installing filter systems upstream.
    • Uneven Water Distribution: If certain areas of the rooftop appear dry, check for blockages in the tubing or lower emitter output rates. Adjust the emitters or reposition them to promote even coverage.
    • Leakages: Leaks can occur at connections or from damaged hoses, leading to water waste. Tightening fittings or replacing damaged sections will mitigate this issue.
    • Electrical Failures in Automated Systems: For systems with timers or smart controllers, ensure that power supplies are intact and that the programming is correctly set. Resetting the controller may resolve some issues.

    Optimizing Watering Schedules for Different Types of Plants

    Tailoring watering schedules to meet the specific needs of various plants is crucial for promoting healthy growth while conserving water. Factors such as plant type, growth stage, and environmental conditions should be taken into account.

    • Deep-rooted Plants: Plants like trees and large shrubs require deeper watering less frequently. A schedule of once every five to seven days is often effective, ensuring moisture reaches the root zone.
    • Shallow-rooted Plants: Herbs and annual flowers generally have shallower roots and benefit from more frequent, shorter watering sessions, ideally two to three times per week.
    • Seasonal Adjustments: During hot summer months, increase the frequency of watering sessions, while reducing it during cooler months or rainy seasons. A rain gauge can aid in determining natural rainfall levels.
    • Soil Type Considerations: Sandy soils drain quickly and may require more frequent watering compared to clay soils, which retain moisture longer. Regularly test soil moisture to tailor schedules effectively.

    Environmental Impact and Sustainability

    Rooftop irrigation systems present a transformative solution for urban areas, addressing both water management and sustainability challenges. These systems not only optimize water usage but also contribute to the overall health of the urban environment. As cities grow and the demand for resources intensifies, the adoption of innovative irrigation techniques like rooftop systems becomes crucial for sustainable urban development.Rooftop irrigation systems provide a plethora of environmental benefits by utilizing otherwise unused space for water collection and distribution.

    They help in reducing runoff, thereby minimizing the risk of urban flooding and soil erosion. Additionally, these systems enhance the local ecosystem by promoting plant growth, which can lead to increased biodiversity in urban landscapes.

    Water Conservation Advantages

    The comparison of rooftop irrigation systems to traditional watering methods reveals significant advantages in terms of water conservation. Traditional watering often relies on ground-based systems that can be inefficient and wasteful. In contrast, rooftop systems allow for direct collection and use of rainwater, resulting in substantial water savings. The following points illustrate the water conservation benefits of rooftop irrigation:

    • Direct Rainwater Harvesting: Rooftop systems can capture rainwater directly, reducing dependency on municipal water sources.
    • Reduced Evaporation Loss: Water applied directly to plants minimizes evaporation, which is a major factor in traditional irrigation systems.
    • Efficient Application: Targeted irrigation allows for precision watering, ensuring that plants receive the necessary amounts without excess waste.

    Urban Heat Island Mitigation

    Urban areas often suffer from the heat island effect, where temperatures are significantly higher than in surrounding rural areas due to human activities and infrastructure. Rooftop irrigation systems can play a pivotal role in mitigating this effect by promoting plant growth and enhancing overall green cover. The cooling effect of plants helps to lower ambient temperatures in urban settings. Key aspects of this impact include:

    • Cooling Through Evapotranspiration: Plants release moisture into the air, which cools the surrounding environment through the process of evapotranspiration.
    • Increased Green Cover: Rooftop gardens and green spaces contribute to urban greening, further combating the heat island effect.
    • Improved Air Quality: Vegetation helps filter pollutants from the air, resulting in a cleaner and healthier urban atmosphere.

    “The implementation of rooftop irrigation systems not only conserves water but also redefines urban landscapes, creating greener, cooler, and more sustainable cities.”

  • Choosing the right lighting for rooftop spaces with style

    Choosing the right lighting for rooftop spaces with style

    Choosing the right lighting for rooftop spaces sets the stage for unforgettable evenings under the stars. Rooftop areas offer a unique opportunity to blend indoor comfort with outdoor charm, and the right lighting can transform these spaces into inviting retreats. From ambient to task lighting, exploring the ideal choices can enhance your experience, whether you’re hosting a lively gathering or enjoying a quiet night alone.

    This guide dives into various types of lighting suitable for rooftops, comparing options like LED, solar, and traditional fixtures while highlighting how to design an effective lighting layout. Moreover, it emphasizes the importance of selecting decorative fixtures that enhance ambiance while ensuring safety and weather resistance. Understanding these elements is crucial for creating a rooftop oasis.

    Selecting the Right Type of Lighting

    Selecting the right lighting for rooftop spaces is crucial for creating an inviting atmosphere, ensuring safety, and enhancing the aesthetic appeal of the area. A well-lit rooftop can transform a simple open space into a vibrant outdoor retreat. Understanding the various types of lighting available will help in making informed decisions that cater to both functional and decorative needs.When choosing lighting for rooftop spaces, it is essential to consider the three main types: ambient, task, and accent lighting.

    Each type serves a unique purpose and can be utilized to achieve different effects. Ambient lighting provides general illumination, task lighting highlights specific areas for activities such as dining or reading, and accent lighting adds visual interest by highlighting architectural features or plant life.

    Types of Lighting Options

    When evaluating different lighting options, one must consider various factors like energy efficiency, cost, and lifespan. Below are some common lighting technologies suitable for rooftop spaces, along with their advantages and disadvantages:

    • LED Lighting:

      LEDs are highly energy-efficient, with a lifespan of up to 50,000 hours.

      Advantages include low energy consumption and minimal heat emission. However, initial costs can be higher compared to traditional bulbs.

    • Solar Lighting:

      Solar lights harness energy from the sun, making them eco-friendly.

      They are cost-effective in the long run and require no wiring. On the downside, they may not perform well in cloudy conditions and can have limited brightness.

    • Traditional Lighting (Incandescent/Fluorescent):

      Traditional lights are widely available and inexpensive.

      While they offer warm light, they are less energy-efficient and have shorter lifespans compared to LEDs.

    Comparison of Lighting Types

    To facilitate a clearer understanding of different lighting options, the following table compares LED, solar, and traditional lighting based on critical factors:

    Lighting Type Energy Efficiency Initial Cost Lifespan
    LED High Moderate 50,000 hours
    Solar Moderate (Depends on sunlight) Moderate to High 30,000 hours
    Traditional Low Low 1,000 hours (Incandescent), 10,000 hours (Fluorescent)

    Making the right choice in lighting will not only enhance the usability of rooftop spaces but also contribute to energy savings and the overall aesthetic appeal of the area. Each lighting type has its strengths and weaknesses, and understanding these can lead to a well-lit, harmonious rooftop experience.

    Designing a Lighting Layout

    Choosing the right lighting for rooftop spaces

    Creating an effective lighting layout for rooftop spaces is essential for maximizing the utility and enjoyment of these areas. Properly planned lighting not only enhances the aesthetic appeal but also ensures safety and functionality for various activities. This guide Artikels a step-by-step approach to designing a lighting layout that accommodates different purposes, from dining to relaxation.To create a successful lighting layout, it is important to consider the specific zones for your rooftop space.

    Each zone should be tailored to the activities expected to take place there, with appropriate lighting that enhances the experience while providing safety and comfort. Below is a structured guide for designing your rooftop lighting layout.

    Step-by-Step Guide to Lighting Layout Design, Choosing the right lighting for rooftop spaces

    When designing the lighting layout, follow these key steps to ensure that each area of your rooftop serves its intended purpose effectively.

    1. Evaluate the Space: Begin by assessing the dimensions and layout of your rooftop. Identify areas for specific activities like dining, lounging, or gardening.
    2. Determine Lighting Needs: Consider the type of activities that will take place in each zone and the amount of light required. For instance, dining areas may need brighter lighting compared to relaxing spaces.
    3. Choose Lighting Fixtures: Select appropriate fixtures based on style, functionality, and energy efficiency. Options may include LED string lights, wall sconces, or floor lamps.
    4. Design Layout Zones: Divide the rooftop into distinct zones, each with its specific lighting requirements.
    5. Plan Electrical Sources: Ensure that power outlets are conveniently located for your lighting fixtures and that the wiring is safely installed.
    6. Test & Adjust: Before finalizing your layout, test the lights in different settings to see how they illuminate the space. Adjust fixture placement as needed for optimal light distribution.

    Incorporating Lighting Zones for Different Activities

    Creating lighting zones allows for a tailored atmosphere suited to various activities on the rooftop. Each zone should be distinct, ensuring that the lighting serves its intended purpose effectively. Below is a table detailing suggested lighting placements and their corresponding purposes.

    Further details about Ideas for rooftop party decorations and themes is accessible to provide you additional insights.

    Zone Lighting Type Purpose
    Dining Area Suspended pendant lights or string lights Provide bright, focused light for dining; create an inviting atmosphere.
    Lounging Area Soft, ambient floor lamps or wall sconces Enhance relaxation with warm light; encourage social interaction.
    Gardening Space Spotlights or task lighting Illuminate specific plants and working areas; facilitate gardening during evening hours.
    Entertainment Zone Color-changing LED lights or fairy lights Create a vibrant atmosphere; set mood for movie nights or gatherings.
    Walkways Recessed lights or solar path lights Ensure safety and visibility; guide guests through the space comfortably.

    “A well-designed lighting layout not only enhances the beauty of rooftop spaces but also elevates the overall experience, making it feel like an extension of your home.”

    Enhancing Ambiance with Lighting Fixtures: Choosing The Right Lighting For Rooftop Spaces

    Choosing the right lighting for rooftop spaces

    Creating a captivating ambiance in rooftop spaces involves careful selection and placement of lighting fixtures that not only illuminate but also enhance the overall aesthetic. The right fixtures can transform an ordinary rooftop into a tranquil escape or a vibrant entertaining space. Understanding the interplay between design and function is key to achieving the desired atmosphere.Lighting fixtures serve as both practical tools and decorative elements.

    Selecting decorative lighting that aligns with the rooftop’s theme can elevate the entire space. Consider how various styles of fixtures can complement the architecture and furnishings of your rooftop. Using dimmable lights is another effective method for adjusting the ambiance according to different occasions, allowing you to create a cozy atmosphere for intimate gatherings or bright lighting for lively parties.

    Selection of Decorative Lighting Fixtures

    Choosing decorative lighting fixtures is essential for creating an ambiance that reflects your personal style and complements the rooftop’s design. Here are some tips to guide your selection:

    Assess the overall theme

    Ensure that the lighting fixtures align with the existing design elements of the rooftop.

    Scale and proportion

    Choose fixtures that are appropriately sized for the space. Oversized fixtures can dominate a smaller area, while tiny lights may get lost in a vast space.

    Material and finish

    Opt for materials that withstand outdoor conditions while matching the aesthetic, such as weather-resistant metals or glass.

    Layered lighting

    Combine different types of fixtures, such as wall sconces, pendant lights, and string lights, to create depth and warmth.Furthermore, the use of dimmable lights allows for maximum versatility in how the space is used throughout the day and night.

    Popular Lighting Styles

    When considering the aesthetic of your rooftop, selecting the right lighting style can have a profound impact. Below are several popular lighting styles that can enhance the ambiance of your rooftop space:

    Modern

    Clean lines, minimalistic designs, and often featuring materials like metal and glass. Perfect for contemporary rooftops.

    Rustic

    Incorporates natural elements such as wood, wrought iron, and vintage finishes. Ideal for a cozy, farmhouse-style setting.

    Industrial

    Characterized by raw, unfinished materials, exposed bulbs, and utilitarian designs. Works well in urban environments or loft-style rooftops.

    Bohemian

    Features eclectic and colorful designs, such as pendant lights with intricate patterns. Adds a relaxed, artistic vibe.

    Mediterranean

    Often includes lantern-style fixtures and warm finishes, reminiscent of coastal getaways. Great for creating a vacation-like atmosphere.Implementing these styles thoughtfully will ensure your rooftop space not only shines but also resonates with your intended ambiance.

    Safety Considerations for Rooftop Lighting

    Rooftop lighting plays a crucial role in enhancing both the aesthetic and functional aspects of outdoor spaces. However, safety should always be a top priority during installation and maintenance. Understanding the essential safety standards and regulations, as well as implementing secure and weather-resistant designs, can prevent accidents and ensure longevity of the lighting systems.Adhering to safety standards and regulations is fundamental in rooftop lighting installations.

    These standards vary by location, but generally, they encompass electrical safety codes, structural integrity requirements, and specific guidelines for outdoor installations. Compliance with local building codes, such as the National Electrical Code (NEC) in the United States, ensures that lighting systems are safely integrated into the rooftop environment. This not only protects the users but also minimizes liability risks for property owners.

    Essential Safety Standards and Regulations

    Several key regulations guide the safe installation of rooftop lighting systems. Familiarizing yourself with these can significantly enhance safety:

    • Local Building Codes: Ensure compliance with municipal regulations that dictate structural and electrical standards for rooftop installations.
    • National Electrical Code (NEC): Familiarize yourself with NEC guidelines to prevent electrical hazards, including proper grounding and circuit protections.
    • OSHA Regulations: Adhere to Occupational Safety and Health Administration (OSHA) guidelines to ensure worker safety during installation and maintenance processes.

    Secure and Weather-Resistant Lighting Fixtures

    Selecting the right lighting fixtures is vital for the safety and durability of rooftop lighting systems. Fixtures must be designed to withstand various weather conditions, such as rain, snow, and extreme temperatures. Utilizing fixtures that have a suitable IP rating (Ingress Protection) helps in determining their resistance to dust and water.Also, consider materials that are rust-resistant, such as aluminum or stainless steel, which can prolong the life of your lighting fixtures and prevent accidents caused by corrosion.

    Checklist of Safety Features

    When choosing and installing rooftop lighting, the following checklist of safety features will help ensure a secure and efficient setup. This will serve as a reliable guide during the selection and installation process:

    • ✔ Waterproof ratings: Look for fixtures with a minimum IP65 rating to ensure they can resist water intrusion.
    • ✔ Secure mounting: Use robust mounting hardware and brackets designed for rooftop applications to prevent fixtures from becoming dislodged.
    • ✔ UV protection: Opt for fixtures with UV-resistant materials to prevent degradation from sun exposure.
    • ✔ Anti-glare features: Choose fixtures designed to minimize glare, improving visibility and safety for users.
    • ✔ Circuit protection: Implement surge protectors and circuit breakers to guard against electrical surges.
  • How to create a rooftop BBQ area for ultimate fun

    How to create a rooftop BBQ area for ultimate fun

    How to create a rooftop BBQ area is more than just setting up a grill; it’s about transforming your rooftop into a vibrant social hub where friends and family gather to enjoy delicious food and great company. Imagine hosting evenings under the stars, the tantalizing aroma of grilled delicacies wafting through the air, and laughter echoing as you savor moments together.

    In this guide, we’ll explore the essential steps to design and elevate your rooftop BBQ space, ensuring it’s both functional and inviting.

    From planning the perfect location to selecting materials that withstand the elements, every aspect of creating your rooftop BBQ area is crucial. We’ll delve into how to layout your space effectively, choose the right grill and equipment, and enhance the atmosphere with thoughtful decor and furniture choices.

    Planning Your Rooftop BBQ Area

    Creating a rooftop BBQ area is an exciting venture that can transform an underutilized space into an outdoor oasis. The planning phase is crucial as it sets the foundation for not only the functionality of the space but also the safety and aesthetic appeal. This guide will help you navigate the vital considerations to ensure your rooftop BBQ area is both enjoyable and compliant with local regulations.

    Identifying the Ideal Location

    Choosing the right location on your rooftop for the BBQ setup is paramount. Think about the accessibility, proximity to kitchen facilities, and how the position will interact with the wind patterns. An advantageous spot can enhance the experience by providing both scenic views and ease of use. The area should be flat and stable to accommodate the BBQ grill and seating.

    Additionally, consider existing structures such as pergolas or railings that may provide shade or protection from the wind.

    Safety Considerations and Regulations

    Safety is a top priority when planning your rooftop BBQ area. It’s essential to be aware of local regulations that govern outdoor cooking and fire safety. This includes determining the distance required from the building edge and surrounding structures.

    Explore the different advantages of Ideas for rooftop party decorations and themes that can change the way you view this issue.

    “Always check local codes to ensure compliance with safety regulations during BBQ installations.”

    Here are some key safety considerations:

    • Ensure proper ventilation to avoid smoke accumulation.
    • Use non-flammable materials in the construction of the BBQ area.
    • Implement fire safety measures, such as having a fire extinguisher within easy reach.
    • Consult a structural engineer if modifications to the rooftop are necessary.

    Selecting Appropriate Materials

    The materials you choose for your rooftop BBQ area play a significant role in its durability and overall aesthetic. Opt for weather-resistant materials that can withstand the elements, maintaining functionality and appearance over time.When selecting materials, consider the following:

    • Stainless steel for grills and fixtures, due to its corrosion resistance.
    • Composite decking or stone tiles for flooring that is slip-resistant and durable.
    • Weatherproof furniture that complements the outdoor atmosphere while providing comfort.
    • Fire-rated materials for any construction surrounding the grill to enhance safety.

    Incorporating thoughtful planning, safety measures, and suitable materials will ensure that your rooftop BBQ area is a delightful retreat for gatherings and culinary adventures.

    Designing the BBQ Layout: How To Create A Rooftop BBQ Area

    How to create a rooftop BBQ area

    Creating a well-thought-out BBQ layout is essential for maximizing enjoyment and functionality in your rooftop space. A thoughtfully designed BBQ area not only enhances the cooking experience but also fosters a social atmosphere where friends and family can gather comfortably. When designing your BBQ layout, it is important to consider the flow of the space, ensuring that all essential elements are easily accessible while accommodating the number of guests expected.

    This involves planning the placement of the grill, prep stations, and dining areas to create a seamless cooking and dining experience.

    Blueprint for the BBQ Area

    A detailed blueprint serves as the foundation for your BBQ layout. It should encompass all features of the BBQ area, including seating arrangements and essential appliances. Begin by sketching the overall dimensions of your rooftop, identifying where your BBQ area will be positioned. Consider the following when creating your blueprint:

    • Grill Placement: Position your grill in a location that provides ample ventilation, away from obstructions, and ideally with a view of the surroundings to make cooking an enjoyable experience.
    • Prep Stations: Include dedicated prep areas close to the grill to facilitate the easy transfer of food from prep to cooking. Ensure these areas have adequate counter space and access to tools and ingredients.
    • Dining Areas: Arrange seating to encourage conversation and interaction, making sure tables and chairs are comfortably spaced and can accommodate your expected number of guests.

    Essential Features for Your BBQ Area

    Incorporating essential features into your BBQ area enhances both functionality and comfort. Below are important elements to consider:

    • Storage Options: Designate areas for storing utensils, grill tools, and cooking supplies. Consider built-in cabinets or weatherproof storage bins to keep items organized and protected.
    • Lighting Solutions: Adequate lighting is crucial for evening gatherings. Use a combination of overhead fixtures, string lights, and task lighting near the grill and prep areas to create an inviting ambiance.
    • Waste Management: Include a discreet waste bin to keep the area tidy. An organized space contributes to a better cooking and dining experience.
    • Heating Elements: If you plan to use the rooftop area during cooler months, consider adding a patio heater or a fire pit to ensure comfort for your guests.

    By carefully considering these aspects in your BBQ layout design, you will create a space that is not only functional but also a true extension of your home, perfect for entertaining and enjoying delicious meals under the sky.

    Choosing the Right Grill and Equipment

    Selecting the right grill and equipment is essential for any rooftop BBQ area. The grill not only serves as the centerpiece of your cooking setup but also impacts the overall experience, flavor of the food, and ease of use. Understanding the different types of grills available and the necessary tools can ensure that your rooftop BBQ is a success.

    Comparison of Grill Types for Rooftop Use, How to create a rooftop BBQ area

    When it comes to rooftop grilling, several types of grills stand out, each with its unique features, benefits, and drawbacks. The choice of grill influences cooking style, flavor, and convenience. Here are the main types to consider:

    • Gas Grills: These are popular for their convenience and ease of use. Gas grills heat up quickly and allow for precise temperature control. They are ideal for those who want to cook with minimal setup time. However, consider the availability of gas lines or propane tanks on your rooftop.
    • Charcoal Grills: Known for imparting a distinct smoky flavor, charcoal grills require more time and effort for setup and cooking. They can be excellent for those who prioritize flavor and enjoy the traditional grilling experience. However, they may produce more smoke, which could be a consideration in an urban environment.
    • Electric Grills: Perfect for rooftop spaces with limited ventilation, electric grills provide a safe and easy alternative. They are compact and can be used in smaller areas. Although they may not achieve the same high temperatures as gas or charcoal grills, they offer consistent heat for cooking.
    • Portable Grills: If your rooftop space is limited, portable grills are a flexible option. They come in various forms, including small gas, charcoal, or electric models, allowing you to enjoy BBQ without sacrificing space.

    Essential Tools and Accessories for BBQ Cooking

    Equipping your BBQ area with the right tools and accessories enhances the cooking experience and ensures food is prepared efficiently. Here are some must-have items for your rooftop BBQ setup:

    • Grilling Tools: Essential tools include long-handled tongs, spatulas, and basting brushes. Invest in a good-quality set that can withstand high temperatures.
    • Thermometers: A reliable meat thermometer is crucial for grilling meats to the right internal temperature, ensuring food safety and perfect doneness.
    • Grill Covers: Protect your investment with a weather-resistant grill cover. This helps prolong the life of your grill, especially when exposed to the elements.
    • Serving Utensils: Have a selection of serving platters, skewers, and grilling baskets to make cooking and serving easier.
    • Cleaning Supplies: A grill brush and cleaning wipes are essential to maintain the cleanliness and hygiene of your grill after use.

    Energy Sources for Rooftop BBQs

    The choice of energy source for your rooftop BBQ can greatly affect installation requirements, cooking time, and flavor. Each energy source has its own advantages:

    • Gas: Propane and natural gas provide a quick and easy heat source, making them popular for many grillers. They allow for precise control over the heat and are ready to cook within minutes.
    • Charcoal: While requiring more time to ignite and stabilize, charcoal is favored by many for its ability to infuse food with a deep, rich flavor. It’s also an excellent choice for high-heat searing.
    • Electric: Ideal for urban settings where gas or charcoal might be impractical, electric grills are easy to operate and require no additional fuel. They can be plugged in and used with minimal setup.

    Enhancing the Rooftop Experience

    Creating an inviting rooftop BBQ area extends beyond the grill and seating; it encompasses the overall atmosphere that transforms a simple gathering into a memorable experience. By focusing on landscaping, selecting the right furniture, and establishing the perfect ambiance, you can elevate your rooftop space into a personal retreat that entices friends and family alike.

    Landscaping and Decorations

    Landscaping plays a crucial role in defining the character of your rooftop BBQ area. Thoughtful greenery and decor can soften hard surfaces and instill a sense of tranquility. Consider the following ideas for enhancing your rooftop’s natural beauty:

    • Potted Plants: Incorporate a variety of potted plants and flowers. Choose low-maintenance options like succulents, ornamental grasses, or flowering herbs. These not only add color but can also provide fresh ingredients for your grilling needs.
    • Vertical Gardens: Utilize vertical planters or trellises to maximize space. Climbing plants like ivy or jasmine can create a lush wall of greenery without taking up valuable floor space.
    • Themed Decorations: Introduce decorations that reflect your personal style. For instance, a coastal theme can be created with driftwood, seashells, and nautical decor, while an industrial vibe could incorporate metals and reclaimed wood.

    Outdoor Furniture

    Selecting outdoor furniture that can withstand the elements is paramount for maintaining a comfortable and stylish BBQ area. Look for materials that resist fading, moisture, and rust. Here are some durable options to consider:

    • Aluminum Furniture: Lightweight and rust-resistant, aluminum furniture is ideal for outdoor settings. Look for powder-coated finishes for added durability and color retention.
    • Teak Wood: Teak is naturally resistant to water and decay, making it a premier choice for outdoor furniture. Its rich color and texture also elevate the aesthetic of your BBQ area.
    • Weather-Resistant Fabrics: Choose cushions made from materials like acrylic or polyester that are specifically designed to resist fading and mildew. Ensure they come with removable covers for easy cleaning.

    Cozy Ambiance with Lighting and Heating

    Creating a cozy ambiance on your rooftop is essential for enjoying those late-night BBQ gatherings. The right lighting and heating options can make your space feel warm and inviting. Consider these methods to enhance your evening experience:

    • String Lights: Hang string lights or fairy lights around the perimeter or overhead. They create a magical atmosphere and can be easily adjusted for brightness.
    • Lanterns and Candles: Incorporate lanterns or candleholders for a soft glow. Opt for battery-operated or solar-powered options for convenience and safety.
    • Outdoor Heaters: Install patio heaters or use portable models to extend the use of your rooftop space into cooler evenings. Look for stylish designs that complement your overall decor.

    “An inviting atmosphere is as crucial as the food itself; it transforms a meal into a cherished memory.”