Author: Admin234

  • Benefits of green roofs for urban environments

    Benefits of green roofs for urban environments

    Benefits of green roofs for urban environments take center stage as they emerge as a revolutionary solution to the challenges faced by modern cities. These innovative landscapes not only enhance urban biodiversity by providing essential habitats for various species, but they also contribute significantly to the ecological balance in densely populated areas. Cities like Zurich and Chicago serve as prime examples, showcasing how green roofs can effectively mitigate the urban heat island effect and foster environmental resilience, creating a greener future for all urban dwellers.

    Furthermore, green roofs play a pivotal role in stormwater management, effectively improving water quality while also actively participating in carbon sequestration. The long-lasting positive impacts on air quality highlight their potential as indispensable assets in combating climate change. As urban areas continue to grow, the relevance of these green innovations becomes ever more critical.

    Importance of Green Roofs

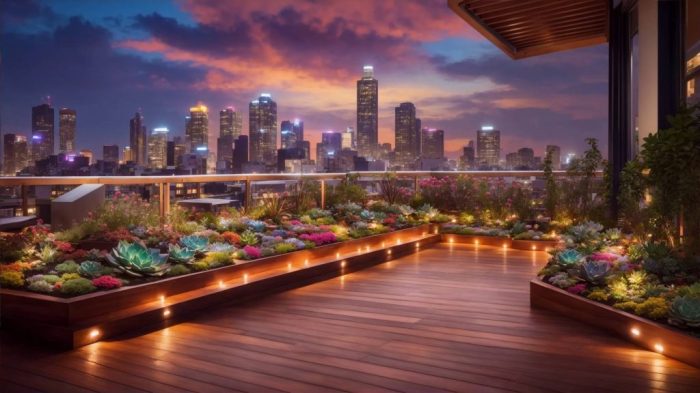
    Green roofs are increasingly recognized as vital components in enhancing urban ecosystems. They provide a multi-faceted approach to sustainable urban living by promoting biodiversity, mitigating climate change effects, and improving the overall quality of life in densely populated areas. By integrating vegetation into the urban landscape, green roofs offer unique habitats that support various species, thereby fostering ecological balance.

    Biodiversity Contribution in Urban Areas, Benefits of green roofs for urban environments

    Green roofs are instrumental in creating habitats that support local fauna, particularly in urban environments where traditional greenery is often scarce. These installations can host a variety of plant species, which in turn attract numerous insects, birds, and small mammals. For instance, a green roof can sustain pollinators such as bees and butterflies, which are essential for plant reproduction and food production.

    Cities like Chicago have successfully implemented extensive green roofing programs. The city’s City Hall green roof has been a pioneer, demonstrating how urban spaces can transform into biodiversity hotspots. This green roof supports a range of native plants and provides a habitat for birds and insects, contributing to ecological resilience. Similarly, in Toronto, the city’s green roof bylaw encourages the installation of green roofs, resulting in a significant increase in local biodiversity and improved air quality.

    Urban Heat Island Mitigation

    The phenomenon known as the urban heat island (UHI) effect describes the temperature difference between urban areas and their rural surroundings, often leading to elevated energy consumption and exacerbated health issues. Green roofs serve as a natural solution to this issue by providing insulation and cooling benefits. The vegetation on green roofs absorbs sunlight and reduces heat absorption by building materials, effectively lowering ambient temperatures.Research indicates that green roofs can reduce rooftop temperature by up to 60% compared to conventional roofs, resulting in lower energy costs for cooling in summer months.

    This not only benefits individual buildings but also contributes to the overall cooling of the urban environment, thus alleviating the UHI effect. Cities like New York have initiated programs to increase green roof installations, recognizing their significant role in temperature regulation and energy conservation.

    “Integrating green roofs into urban architecture is not just about aesthetics; it is a strategic move toward enhancing biodiversity and combating climate change.”

    In conclusion, the importance of green roofs in urban areas extends far beyond their visual appeal. They are crucial for fostering biodiversity, mitigating urban heat, and improving sustainability in city landscapes. As more cities embrace green roofing technologies, the potential ecological and environmental benefits will continue to grow.

    Environmental Benefits

    The implementation of green roofs in urban environments offers significant environmental benefits that contribute to the sustainability and resilience of cities. By integrating vegetation into building designs, green roofs address multiple ecological challenges, especially in densely populated areas. The following sections will explore the impacts of green roofs on stormwater management, air quality improvement, and carbon sequestration.

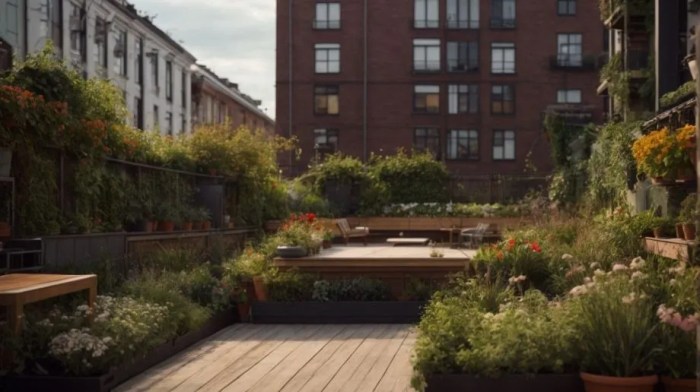
    Do not overlook the opportunity to discover more about the subject of How to design a rooftop garden effectively.

    Stormwater Management and Water Quality

    Green roofs play a crucial role in managing stormwater by absorbing and retaining rainfall. This absorption mitigates runoff, reducing the burden on urban drainage systems and minimizing the risk of flooding. Furthermore, the vegetation and substrate of green roofs act as natural filters, improving water quality by trapping pollutants and sediments before they reach storm drains. The following points illustrate the effectiveness of green roofs in stormwater management:

    • Retention Capacity: Green roofs can retain up to 80% of rainfall, depending on the design and plant selection, which significantly reduces the volume of stormwater runoff.
    • Peak Flow Reduction: By delaying runoff, green roofs help maintain a more stable water flow, preventing sudden surges that can overwhelm drainage systems.
    • Pollutant Filtration: The soil and plant layers on green roofs filter out contaminants such as heavy metals and nutrients, improving the quality of water that eventually enters the urban water systems.

    Air Quality Improvement

    Green roofs contribute positively to urban air quality by reducing air pollutants and enhancing oxygen levels. The presence of plants aids in the absorption of carbon dioxide while releasing oxygen through the process of photosynthesis. This natural filtering process is essential in urban areas, where air pollution levels are often elevated due to vehicle emissions and industrial activity.The impact of green roofs on air quality can be summarized as follows:

    • Reduction of Particulate Matter: Green roofs can capture airborne particles, which decreases the concentration of particulate matter in the atmosphere.
    • Absorption of CO2: Plants on green roofs absorb carbon dioxide, helping to mitigate the greenhouse gas effect in urban environments.
    • Reduction of Urban Heat Island Effect: By providing shade and releasing moisture through evapotranspiration, green roofs lower the ambient temperature, which can enhance air quality further.

    Carbon Sequestration Capabilities

    The carbon sequestration capabilities of green roofs are vital for combating climate change. By storing carbon in both plant biomass and soil, green roofs act as a carbon sink that can significantly offset emissions from urban activities.Key aspects of carbon sequestration through green roofs include:

    • Plant Growth: The growth of vegetation on green roofs sequesters carbon dioxide from the atmosphere, converting it into biomass through photosynthesis.
    • Soil Carbon Storage: The organic matter in the growing medium of green roofs contributes to soil health and enhances its ability to store carbon over time.
    • Long-term Impact: Studies indicate that mature green roofs can sequester over one ton of carbon per year, contributing to urban carbon reduction strategies.

    Economic Advantages: Benefits Of Green Roofs For Urban Environments

    Benefits of green roofs for urban environments

    Green roofs offer a myriad of economic benefits that extend beyond their initial installation costs. As urban environments become increasingly dense and resource-strapped, the integration of green roofs emerges as a financially sound strategy for both property owners and municipalities. From energy savings to enhanced property values, the economic advantages of green roofs are compelling and multifaceted.One of the primary financial benefits of green roofs is the significant energy savings they facilitate.

    By providing natural insulation, green roofs reduce the need for heating in the winter and cooling in the summer. This translates into lower energy bills for homeowners and businesses. Additionally, studies indicate that properties with green roofs can experience a reduction in energy costs by up to 25%. This is particularly important considering that energy prices continue to rise.

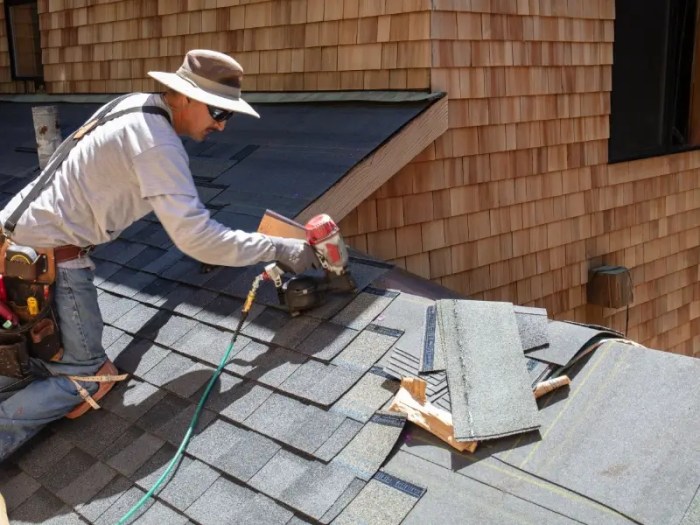
    Comparison of Maintenance Costs

    When evaluating the long-term financial implications of green roofs versus traditional roofing systems, maintenance costs play a crucial role. Although the initial investment for a green roof may be higher, the long-term maintenance costs tend to be lower and can lead to significant savings over time. The following points highlight the comparative maintenance considerations:

    • Durability: Green roofs are designed to last longer than traditional roofs due to their protective vegetation layer, which minimizes UV exposure and temperature fluctuations.
    • Maintenance Frequency: Traditional roofs often require more frequent repairs and replacements, contributing to ongoing expenses. In contrast, green roofs typically need only periodic checks and maintenance, which can be more manageable and cost-effective.
    • Water Management: Green roofs improve stormwater management, reducing the risk of water damage and costly repairs associated with leaks and drainage issues commonly found in traditional systems.
    • Insurance Savings: Some insurance providers offer reduced premiums for properties with green roofs, recognizing their resilience to extreme weather and lower risk of damage.

    Job Creation Potential

    The growing interest in green roofs has spurred job creation within the installation and maintenance industries. As urban areas increasingly adopt this sustainable technology, a variety of employment opportunities arise, contributing positively to local economies.The potential job creation can be categorized as follows:

    • Installation Specialists: Professionals skilled in the design and installation of green roofs are in high demand as the market expands.
    • Maintenance Technicians: Regular upkeep of green roofs requires a workforce adept at horticulture and environmental management, further enhancing job availability.
    • Consultants and Designers: Landscape architects and environmental consultants are needed to plan and implement green roofing projects tailored to specific urban environments.

    In summary, the economic advantages of green roofs are clear and substantial. They provide significant energy savings, lower maintenance costs, and contribute to job creation in growing sectors. This makes green roofs not only an environmentally friendly option but also a financially viable choice for urban infrastructure development.

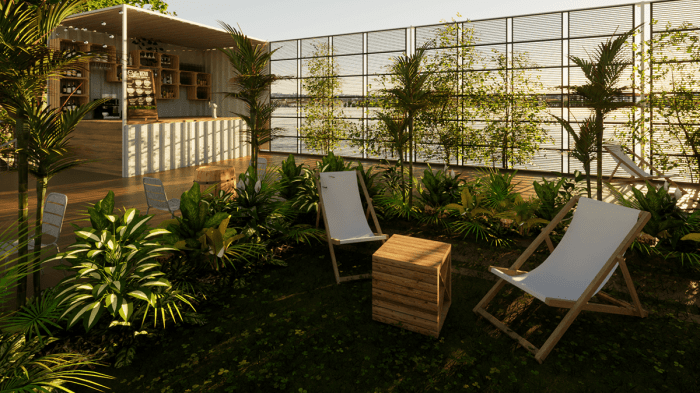
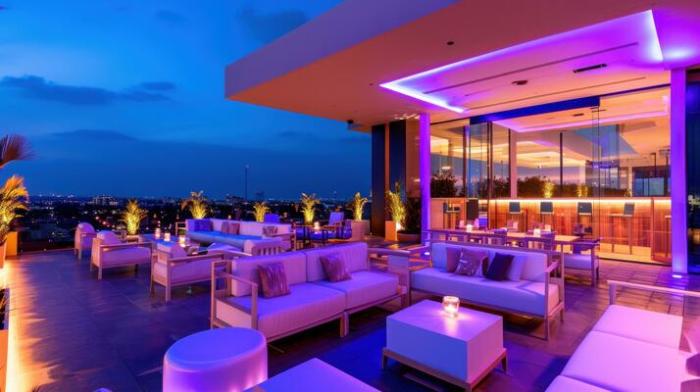
    Social and Aesthetic Value

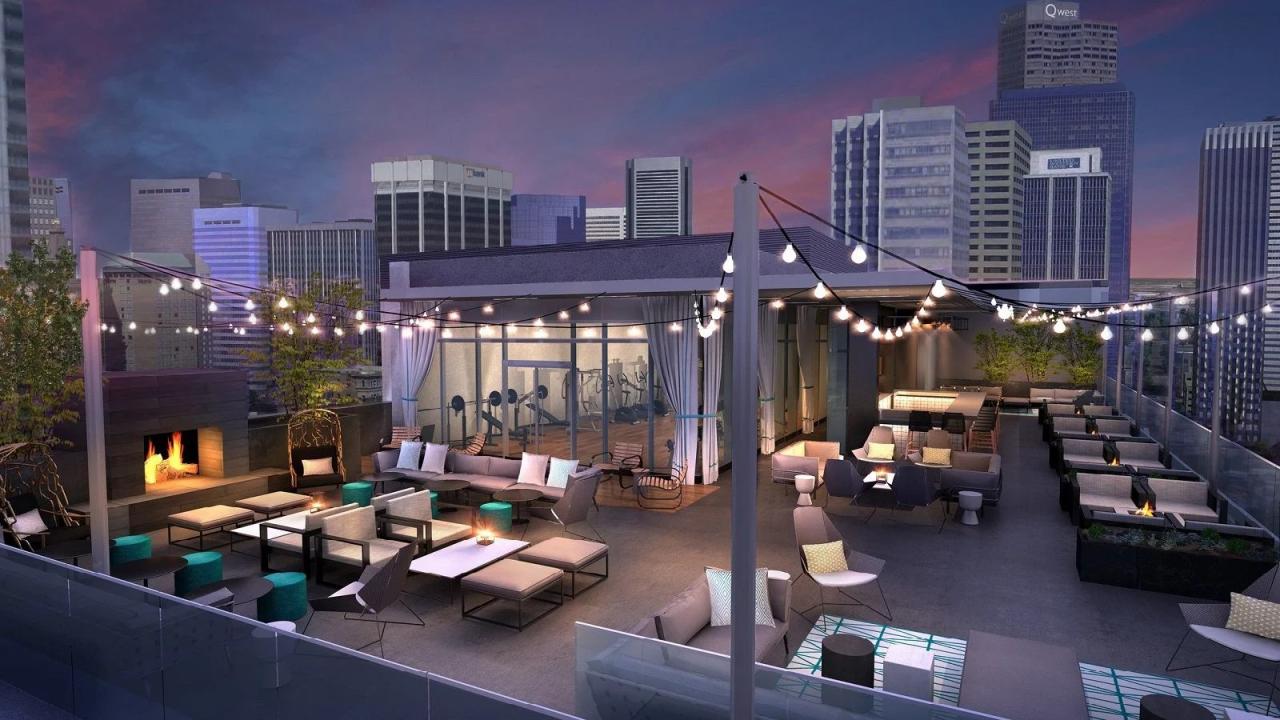
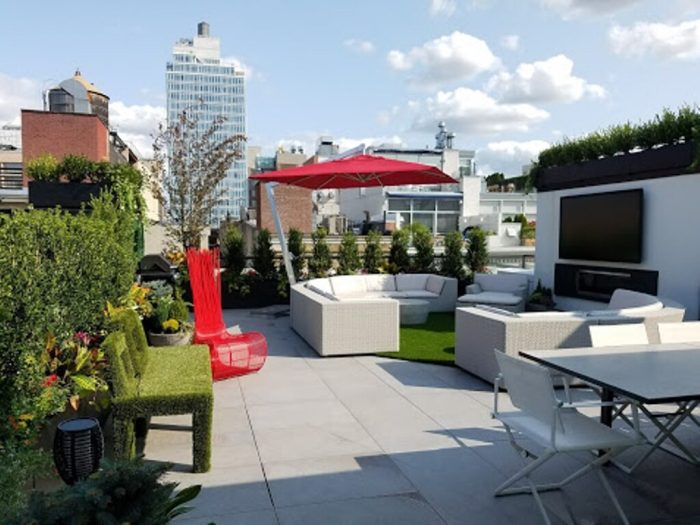
    Green roofs are not merely a functional aspect of urban architecture; they significantly enhance the social and aesthetic landscape of urban environments. By integrating nature into cityscapes, green roofs foster a sense of community, promote well-being, and contribute to the overall beauty of urban areas. These lush, vibrant spaces offer more than just a visual appeal; they act as essential components for fostering social interactions and improving quality of life in densely populated settings.The incorporation of green roofs into urban planning has profound psychological benefits for residents.

    Research has consistently shown that exposure to green spaces can reduce stress, improve mood, and enhance cognitive function. The simple presence of greenery in an industrialized environment can evoke feelings of tranquility and connection to nature, which are often lacking in urban life. Studies indicate that individuals living near green spaces report higher levels of happiness and lower instances of mental health issues.

    Community Engagement Strategies for Promoting Green Roof Projects

    To effectively promote the adoption of green roofs, community engagement is crucial. Engaging residents not only raises awareness but also encourages collective action towards sustainability. The following strategies can be employed to foster community involvement in green roof projects:

    • Organize local workshops and informational sessions to educate residents about the benefits and maintenance of green roofs.
    • Create community committees to oversee green roof initiatives, ensuring residents have a voice in the planning and implementation processes.
    • Develop partnerships with local schools and universities to involve students in green roof design and maintenance programs, fostering a sense of ownership and responsibility.
    • Host community planting days where residents can come together to plant and maintain green roofs, enhancing social bonds and environmental stewardship.
    • Utilize social media platforms to share progress, success stories, and the ecological impacts of existing green roofs, encouraging broader community support and participation.
  • Rooftop bar installation tips for beginners made easy

    Rooftop bar installation tips for beginners made easy

    Rooftop bar installation tips for beginners offer a gateway to creating a stylish and functional outdoor space that can enhance any gathering. As urban living gains popularity, the allure of rooftop bars becomes undeniable, providing not only a stunning view but also a unique experience. In this guide, we will explore the essential components of planning, designing, installing, and maintaining your rooftop bar, ensuring you create a welcoming environment that resonates with your guests.

    From the initial planning stages, where location and permits play a crucial role, to the design and installation process that requires careful consideration of layout and safety, every step counts. By the end, you’ll be equipped with practical knowledge and tips tailored for beginners looking to transform their rooftop into an inviting social space.

    Planning Your Rooftop Bar

    Rooftop bar installation tips for beginners

    Establishing a successful rooftop bar involves meticulous planning and consideration of various elements that can influence its overall appeal and functionality. From choosing the right location to understanding local regulations, every detail contributes to creating an inviting atmosphere that resonates with your target audience.When planning your rooftop bar, several essential factors must be taken into account to ensure a smooth installation and operation.

    Key among these factors are location and accessibility, which directly impact customer experience and foot traffic. Understanding the necessary permits and regulations for rooftop installations in your area is crucial to avoid legal pitfalls. Additionally, selecting a theme and ambiance that aligns with your target demographic can differentiate your establishment from the competition.

    Location and Accessibility

    The success of a rooftop bar largely hinges on its location and how accessible it is for patrons. A highly visible and easily reachable location can enhance foot traffic and customer engagement. Here are critical considerations:

    • Visibility: Choose a location that is visible from busy streets or landmarks to attract passersby.
    • Accessibility: Ensure that the bar can be easily accessed via elevators or stairs, accommodating patrons of all ages and abilities.
    • Surroundings: Be mindful of surrounding businesses and residential areas; a vibrant area with nightlife can augment your bar’s appeal.
    • Safety: Assess the safety of the rooftop, including railing heights and emergency exits, to foster a secure environment for guests.

    Permits and Regulations

    Before moving forward with your rooftop bar, it’s vital to navigate through local permits and regulations that govern rooftop installations. Regulations can vary widely depending on location and can include:

    • Zoning Laws: Check local zoning laws to confirm that rooftop bars are permitted in your chosen area.
    • Building Codes: Ensure compliance with building codes that address structural integrity and safety requirements.
    • Licensing: Obtain the necessary liquor licenses and health permits, which can be a complex process requiring detailed documentation.
    • Noise Regulations: Be aware of local noise ordinances that might affect operational hours and entertainment options.

    Theme and Ambiance Selection

    Choosing a captivating theme and ambiance is central to attracting and retaining your target clientele. Aligning these elements with your audience’s preferences can create a memorable experience. Consider the following aspects:

    • Target Audience: Identify your primary audience demographic—are they young professionals, tourists, or locals looking for a casual hangout?
    • Design Aesthetics: Select design elements, such as furniture, lighting, and decor, that reflect the desired theme and resonate with your target customers.
    • Menu Offerings: Curate a menu that complements the theme—whether it’s craft cocktails, local brews, or gourmet bites, this should align with the overall atmosphere.
    • Event Programming: Plan events or themes for specific nights, such as live music or themed parties, to keep the experience fresh and engaging.

    Design and Layout Considerations: Rooftop Bar Installation Tips For Beginners

    Creating a rooftop bar that exudes charm and functionality requires careful design and layout considerations. The aim is to cultivate an inviting atmosphere while ensuring that patrons feel comfortable and safe. With the right approach, you can transform a simple rooftop space into a vibrant social hub that attracts customers and encourages them to linger.One of the foremost aspects of designing a rooftop bar is to create a layout that promotes free movement while fostering conversation.

    Space optimization is key, particularly in urban settings where square footage may be limited. The careful selection of furniture and equipment is essential in crafting a comfortable environment where patrons can unwind and enjoy their experience.

    Furniture and Equipment Essentials, Rooftop bar installation tips for beginners

    The choice of furniture and equipment plays a significant role in achieving the desired ambiance for your rooftop bar. It is important to select items that not only look good but also provide comfort and functionality. Here are essential considerations for your rooftop bar’s inventory:

    • Seating: Opt for a mix of lounge chairs, bar stools, and communal tables to cater to different group sizes and preferences. Weather-resistant materials enhance durability.
    • Lighting: Incorporate ambient lighting through stylish fixtures, string lights, or lanterns to create a cozy atmosphere as the sun sets.
    • Heating and Cooling: Install outdoor heaters and cooling misters to ensure comfort regardless of weather conditions, allowing year-round patronage.
    • Bar Counter: Design a spacious bar counter with stools that encourage social interaction. Ensure it is accessible for both staff and customers.
    • Planters and Greenery: Incorporate plants or small trees to enhance the aesthetic appeal and create a more inviting space.

    Designing a rooftop bar also involves strategic placement of furniture to maximize the use of available space. It is crucial to ensure that pathways are clear for both patrons and staff, allowing for efficient service and safety.

    Space Optimization and Safety Compliance

    Space optimization in a rooftop bar involves careful planning to ensure that every square foot is utilized effectively. Considerations include the arrangement of seating and tables to create flow and ease of movement. Compliance with safety regulations is equally vital, as it protects patrons and staff alike.To maintain both safety and comfort, implement the following strategies:

    • Layout Planning: Designate areas for dining, lounging, and bar service while ensuring clear pathways for movement. Avoid overcrowding any section.
    • Safety Barriers: Install railings or barriers around the edge of the rooftop to prevent accidents and ensure compliance with local safety codes.
    • Accessibility: Make sure that the layout accommodates all patrons, including those with disabilities, by ensuring accessible pathways and seating.
    • Emergency Exits: Clearly mark emergency exits and ensure they are easily accessible from all areas of the bar.
    • Fire Safety: Adhere to fire safety regulations by keeping flammable materials away from heat sources and having fire extinguishers readily available.

    In summary, effective design and layout considerations for a rooftop bar revolve around creating a welcoming environment while prioritizing functionality and compliance with safety standards. By focusing on essential furniture and optimizing space strategically, you can craft a vibrant venue that encourages social interaction and repeat visits.

    Installation Process

    Rooftop bar installation tips for beginners

    The installation process for a rooftop bar is a crucial phase that brings your vision to life. This stage involves careful planning and execution to ensure that each component is set up safely and effectively. Following a systematic approach can help prevent issues down the line and enhance the overall aesthetic and functionality of your rooftop space.

    Step-by-Step Installation Procedures

    The installation of key components like roofing, flooring, and bar setup requires a methodical approach. Below are detailed procedures to guide you through this process.

    1. Roofing Installation

    Begin by assessing the existing roof structure for any necessary repairs.

    Install a waterproof membrane to prevent leaks; this is essential for protecting the bar area from the elements.

    Lay down roofing materials such as shingles or tiles, ensuring they are properly secured to withstand wind and weather.

    2. Flooring Installation

    Choose durable flooring materials that can withstand outdoor conditions, such as composite decking or treated wood.

    Level the surface to ensure proper drainage; this avoids water pooling which can damage the flooring and bar installations.

    Secure the flooring with screws or nails, following manufacturer guidelines for spacing and layout.

    3. Bar Setup

    Determine the bar’s final location and layout based on your design plan.

    Assemble the bar structure according to pre-determined measurements; ensure it is stable and anchored securely.

    Install countertops and shelving, utilizing waterproof materials where necessary to protect against spills and moisture.

    Tools and Materials Checklist

    Having the right tools and materials on hand is vital for a successful installation. Below is a checklist to help you prepare.

    Tools Required

    Power drill

    – Level

    Tape measure

    Circular saw

    Screwdriver set

    – Hammer Safety gear (goggles, gloves, etc.)

    Materials Needed

    Waterproof membrane

    Roofing materials (shingles, tiles)

    Flooring materials (composite decking, treated wood)

    Bar structure components (wood, screws, brackets)

    Countertop materials (stone, laminate)

    Avoiding Common Pitfalls

    During the installation phase, there are several common pitfalls that can lead to complications. Understanding these issues and their solutions can save you time and resources.

    Poor Planning

    Ensure that all measurements and materials are double-checked before installation to avoid costly mistakes.

    Ignoring Local Regulations

    Familiarize yourself with local building codes and obtain necessary permits to prevent legal complications.

    Inadequate Weatherproofing

    Always prioritize waterproofing measures to protect your investment from potential water damage.

    Neglecting Drainage

    Design your flooring and bar placement with adequate drainage solutions to avoid water accumulation.

    “Proper installation is not just about aesthetics, but functionality and longevity.”

    By following these detailed procedures, using the checklist for tools and materials, and avoiding common pitfalls, you can successfully install your rooftop bar and create an inviting space for relaxation and entertainment.

    Maintenance and Upkeep

    Rooftop bar installation tips for beginners

    Regular maintenance is essential for ensuring the longevity and functionality of your rooftop bar. Proper upkeep not only enhances the aesthetics of your space but also safeguards your investment against the wear and tear of weather elements and daily use. By implementing routine checks and seasonal preparations, you can keep your rooftop bar in optimal condition and ready for guests year-round.Routine maintenance tasks can include a variety of actions, each contributing to the overall health of your rooftop bar.

    These tasks should be performed consistently to prevent more significant issues from developing over time. An effective maintenance schedule should include:

    Routine Maintenance Tasks

    These tasks play a critical role in prolonging the life of your rooftop bar and ensuring that it remains a safe and inviting space. The following are key maintenance tasks to integrate into your routine:

    • Regular cleaning of surfaces, including tables, chairs, and flooring, to prevent the buildup of dirt and grime.
    • Inspecting furniture for damage or wear, replacing or repairing items as necessary to maintain safety and comfort.
    • Checking for and promptly addressing any leaks or signs of water damage, especially in areas prone to heavy rainfall.
    • Ensuring that electrical systems, such as lighting and heating, are functioning properly and conducting necessary repairs or replacements.

    Seasonal Preparations

    Adapting your rooftop bar for seasonal changes is vital in protecting it from harsh weather conditions. Implementing a few seasonal preparation tips can make a significant difference in maintaining the integrity of your bar throughout the year.

    • In winter months, use weatherproof covers for outdoor furniture and equipment to shield them from snow and ice.
    • Before heavy rain, check gutters and drainage systems to ensure they are clear to prevent flooding.
    • In spring, conduct a thorough inspection of your bar for any winter damages and make necessary repairs before reopening.
    • During the fall, clean the bar area of fallen leaves and debris, which can clog drainage and create slip hazards.

    Equipment Storage Strategies

    Properly storing equipment during off-seasons or inclement weather is vital for preserving its functionality and appearance. By following these strategies, you can effectively protect your investments from damage:

    • Store smaller items, such as cushions and decor, indoors to prevent wear and tear from elements.
    • For larger furniture, consider using furniture covers or relocating them to a sheltered area to avoid exposure.
    • Ensure that all equipment is cleaned and dried before storing to prevent mold and mildew buildup.
    • Label storage containers and racks for easy access during peak seasons, ensuring that everything is organized and ready for use.

    “An ounce of prevention is worth a pound of cure” – Benjamin Franklin. Regular maintenance can prevent costly repairs in the future.

  • Best materials for rooftop construction and safety

    Best materials for rooftop construction and safety

    Best materials for rooftop construction and safety are crucial considerations for anyone looking to build or renovate. The right choice not only influences the longevity of the structure but also impacts safety and environmental sustainability. In this exploration, we will delve into the top materials available, their distinct properties, and the safety standards that govern rooftop construction.

    From traditional asphalt to innovative green roofing solutions, understanding the benefits and drawbacks of each material can guide effective decision-making. Furthermore, we will examine essential safety regulations and practices that ensure worker protection during installation and maintenance, making this a comprehensive guide for building a safe and durable rooftop.

    Best Roofing Materials

    Best materials for rooftop construction and safety

    When it comes to rooftop construction, the choice of materials is crucial for ensuring durability, safety, and aesthetic appeal. The right roofing material not only contributes to the overall look of a building but also impacts energy efficiency, maintenance requirements, and longevity. This discussion focuses on the top five roofing materials widely recognized for their performance and benefits in construction.

    Top Roofing Materials

    Understanding the characteristics and advantages of various roofing materials is essential for making informed decisions. The following five materials are among the best options available, each offering unique properties that cater to different needs and preferences.

    • Asphalt Shingles: Widely popular in residential construction, asphalt shingles are known for their affordability and versatility. They come in a variety of colors and styles, which allows homeowners to customize their roofs easily. With a lifespan of 15-30 years, asphalt shingles are relatively durable and provide good protection against various weather conditions. However, they have less environmental impact compared to other materials and may require replacement after a couple of decades.

    • Metal Roofing: Metal roofs are recognized for their exceptional durability and longevity, often lasting 40-70 years. Materials such as steel and aluminum are resistant to extreme weather, fire, and pests. Metal roofs can reflect solar radiant heat, improving energy efficiency in homes. Although the initial cost may be higher than asphalt shingles, their lifespan and low maintenance needs often result in long-term savings.

      Additionally, many metal roofing options are made from recycled materials, making them more environmentally friendly.

    • Clay and Concrete Tiles: Both clay and concrete tiles are favored for their aesthetic appeal and durability. They can withstand harsh weather, including high winds and heavy rain, with lifespans reaching 50 years or more. Their natural insulating properties enhance energy efficiency, reducing heating and cooling costs. However, the weight of these tiles requires a sturdy roof structure, and the upfront cost can be significant.

      Their environmental impact is minimal, especially when sourced sustainably.

    • Slate Roofing: Renowned for its elegance and longevity, slate is one of the most durable roofing materials available, often lasting over a century. Its natural stone composition offers excellent resistance to severe weather, fire, and insects. While slate roofs are more expensive to install, their longevity and low maintenance requirements make them a worthwhile investment. Additionally, slate’s sustainable sourcing contributes to its low environmental impact.

    • EPDM (Ethylene Propylene Diene Monomer): Commonly used in commercial roofing, EPDM is a synthetic rubber that provides excellent weather resistance. Its durability allows it to last 25-30 years, and it requires minimal maintenance. EPDM is also energy efficient, as it can be coated with reflective materials to reduce heat absorption. The cost-effectiveness and ease of installation make EPDM a popular choice for flat roofs.

      However, its environmental impact can vary depending on the manufacturing process and disposal methods.

    The choice of roofing material significantly affects the durability, cost, and environmental footprint of a building. By evaluating the properties and benefits of these top five materials, homeowners and builders can make informed decisions to match their specific needs and preferences.

    Safety Standards in Rooftop Construction: Best Materials For Rooftop Construction And Safety

    Rooftop construction presents numerous challenges and risks, making adherence to safety standards essential for protecting the workforce and ensuring the structural integrity of the building. Safety regulations not only facilitate a secure working environment but also enhance overall project efficiency. This segment delves into the vital safety standards governing rooftop construction, the significance of equipment, and a systematic checklist to ensure safe practices on the job site.

    Essential Safety Regulations

    The construction industry is heavily regulated, and rooftop work is no exception. It is critical to comply with established safety regulations set forth by organizations such as the Occupational Safety and Health Administration (OSHA) in the United States, which Artikels guidelines for fall protection and hazard communication. Key regulations include:

    Fall Protection

    Workers must be protected from falls of six feet or more in the construction industry. This can be achieved using guardrails, safety nets, or personal fall arrest systems.

    Hazard Communication

    Employers are required to provide information about hazardous materials workers may encounter, which should include Safety Data Sheets (SDS) and proper labeling of chemicals.

    Scaffolding Standards

    When scaffolding is used on rooftops, it must meet specific criteria to ensure stability and safety, including proper assembly and load capacity checks.

    Importance of Safety Gear and Equipment, Best materials for rooftop construction and safety

    Proper safety gear and equipment are indispensable in safeguarding workers during rooftop construction. Essential safety equipment includes:

    Hard Hats

    Protect against head injuries from falling objects.

    Safety Harnesses

    Crucial when working at heights, ensuring that a fall does not result in severe injury.

    Non-slip Footwear

    Essential for maintaining traction on potentially slippery surfaces.

    Protective Eyewear

    Shields against debris and harmful rays from the sun.The use of this equipment not only complies with safety regulations but also fosters a culture of safety within the workforce, reducing the likelihood of accidents and injuries.

    Safety Practices Checklist

    Implementing a comprehensive safety practices checklist is vital for any rooftop construction project. The following points highlight key practices to ensure worker safety:Before commencing work, it is essential to conduct thorough preparations and checks:

    • Conduct a risk assessment to identify potential hazards.
    • Ensure all workers have received proper training for rooftop safety.
    • Check weather conditions; avoid working in adverse weather such as storms or high winds.
    • Verify that all safety equipment is in good working condition and readily available.

    During the work process, continuous vigilance and adherence to safety practices are necessary:

    • Utilize guardrails and safety nets where required.
    • Wear appropriate personal protective equipment (PPE) at all times.
    • Maintain clear communication among workers, especially when working in pairs or teams.
    • Keep the work area organized to prevent trips and falls.

    After the completion of work, the following steps should be taken to ensure ongoing safety:

    • Inspect the work area to ensure it is free of hazards before leaving.
    • Conduct a debriefing with workers to discuss any safety issues encountered during the job.
    • Document any incidents or near misses to improve future safety protocols.

    Following these safety standards and practices is not just a legal obligation; it is a moral responsibility to protect the lives of those working on rooftops.

    Installation Techniques for Roofing Materials

    Best materials for rooftop construction and safety

    The installation of roofing materials is a critical phase in any construction project. Proper techniques not only ensure the longevity of the roof but also contribute to the safety and energy efficiency of the entire building. Understanding the unique requirements for different roofing materials can prevent costly mistakes and ensure a secure, durable installation.

    Asphalt Shingle Installation

    Asphalt shingles are one of the most commonly used roofing materials due to their affordability and ease of installation. The following steps Artikel the installation process:

    1. Preparation

    Start by removing the old roofing material and inspecting the decking for damage. Replace any damaged sections before proceeding.

    2. Underlayment Installation

    Install a water-resistant underlayment to protect against moisture infiltration. Begin at the eaves and overlap each row.

    3. Starter Strip

    Install a starter strip along the eaves, which prevents water from seeping under the shingles.

    4. Shingle Placement

    Begin installing shingles from the bottom of the roof and work upward, staggering the seams for better water resistance.

    5. Nailing

    Use the correct number of nails per shingle as recommended by the manufacturer to avoid blow-offs during storms.

    6. Ridge Cap Installation

    Finally, install ridge cap shingles to cover the peak of the roof, enhancing the aesthetic and providing additional protection.Common mistakes to avoid during asphalt shingle installation include not following the manufacturer’s specifications for nail placement, neglecting to install the underlayment properly, and failing to stagger the shingles correctly.

    Metal Roofing Installation

    Metal roofs offer durability and energy efficiency. The installation process involves specific techniques to ensure a proper fit:

    1. Deck Preparation

    Ensure the roof deck is clean, dry, and free from debris. Repair or replace any damaged areas.

    2. Underlayment

    Install a moisture barrier, ensuring it runs perpendicular to the metal panels for optimal drainage.

    3. Panel Layout

    Plan the layout of the metal panels before installation to minimize waste. Start from one side and work toward the other.

    4. Fastening

    Use the appropriate fasteners and ensure they are driven straight to avoid leaks.

    5. Ridge and Edge Details

    Install ridge caps and edge trims to seal and protect the roof’s vulnerable areas.It is crucial to avoid common pitfalls such as mixing different metals, which can cause corrosion, and failing to account for thermal expansion, leading to warping.

    Tile Roofing Installation

    Tile roofs, known for their aesthetic appeal and longevity, require careful installation:

    1. Roof Inspection

    Inspect the roof structure for strength, as tile is heavier than other roofing materials.

    2. Underlayment Installation

    Apply a waterproof underlayment, ensuring it covers the entire roof surface.

    3. Tile Laying

    Start at the bottom and work upwards, securing each tile with nails or clips according to the manufacturer’s guidelines.

    4. Valley and Ridge Installation

    Pay special attention to valleys and ridges, ensuring tiles are interlocked correctly to prevent water stagnation.To avoid mistakes, ensure tiles are properly aligned, and check for cracks or damage before installation.

    Professional Installation Versus DIY Methods

    While DIY installation can save costs, professional installation often guarantees quality and compliance with safety regulations. Professionals bring expertise, ensuring that all materials are installed according to local building codes and best practices. The following points highlight the importance of professional installation:

    Experience

    Professionals have the skills to handle unexpected challenges, such as structural issues or unfavorable weather conditions, that may arise during installation.

    Safety Standards

    Professionals adhere to safety regulations, minimizing risks associated with working at heights.

    Warranty

    Many manufacturers require professional installation to validate warranties, providing peace of mind.In contrast, DIY methods can lead to errors that may compromise the roof’s integrity and result in higher long-term costs due to repairs or replacements. Therefore, weighing the pros and cons of each approach is essential for a successful roofing project.

    Maintenance and Longevity of Rooftops

    Best materials for rooftop construction and safety

    Roof maintenance is crucial in ensuring the longevity of any building, and the rooftop is no exception. Different roofing materials come with unique maintenance requirements, and understanding these can significantly extend the lifespan of a roof. Regular inspections and timely maintenance can help identify issues before they escalate, ensuring that the roof remains a sturdy shield against the elements.Routine maintenance ensures that roofs perform at their best, minimizing the risk of leaks, structural damage, and other issues that can arise over time.

    Various roofing materials, such as asphalt shingles, metal, and tiles, each have specific needs that must be addressed to maximize their lifespan.

    Maintenance Requirements for Different Roofing Materials

    Each roofing material has its own set of maintenance needs. The following Artikels the primary maintenance requirements for common types of roofing materials:

    • Asphalt Shingles: Regular inspections should include checking for curling, cracking, and missing shingles. Cleaning gutters and downspouts is essential to prevent water backup, which can lead to further damage.
    • Metal Roofing: Metal roofs require periodic checks for rust and loose fasteners. It’s important to clean the roof surface to prevent debris accumulation, which can trap moisture and lead to corrosion.
    • Tile Roofing: Tile roofs should be inspected for broken or dislodged tiles. Moss and algae growth should be treated immediately to prevent further damage. Ensure that valleys and flashing areas are kept clear of debris.
    • Flat Roofing: Inspect for cracks and blisters regularly. It’s vital to check drainage systems to ensure water does not pool, which can compromise the roofing material.

    Routine Inspection and Maintenance Schedule

    Establishing a consistent maintenance schedule is essential for prolonging the life of a roof. A practical routine might look as follows:

    • Monthly: Inspect for any visible damage, clean gutters, and remove debris from the roof surface.
    • Seasonally: Conduct a thorough inspection of roofing materials and flashing, looking for wear and tear, particularly after severe weather conditions.
    • Annually: Schedule a professional inspection to assess the overall condition of the roof, checking for underlying issues that may not be visible during routine inspections.

    Common Issues and Their Solutions

    Different roofing materials can face specific issues, and knowing how to address them effectively can save time and money. Below are common problems associated with various roofing types and suggested solutions:

    • Asphalt Shingle Damage: Curling or buckling shingles indicate age or improper installation. Replacement of damaged shingles and ensuring proper ventilation can prevent further issues.
    • Rust on Metal Roofs: Rust can compromise metal roofs. Treat rust spots immediately with a rust-inhibiting primer and paint to restore protection.
    • Leaking Tile Roofs: Cracked or broken tiles can cause leaks. Replace damaged tiles promptly and ensure that flashing is intact to direct water away from vulnerable areas.
    • Ponding Water on Flat Roofs: If water accumulates, it can lead to leaks and structural damage. Installing tapered insulation can help ensure proper drainage.
  • Ideas for rooftop party decorations and themes for every occasion

    Ideas for rooftop party decorations and themes for every occasion

    Ideas for rooftop party decorations and themes open the door to an enchanting world where creativity meets celebration. Rooftop gatherings offer a unique backdrop that invites imaginative themes and eye-catching decor, allowing hosts to craft unforgettable experiences under the open sky. From a Tropical Paradise vibe to a cozy Movie Night Under the Stars, the possibilities are endless, providing an ideal setting for friends and family to connect and enjoy.

    Whether you’re looking to establish a vibrant atmosphere with string lights and whimsical centerpieces or seeking inspiration for seasonal decorations that adapt to the changing weather, this guide will walk you through the essential elements. Engaging interactive decor elements can also ignite guest participation, ensuring that every moment is filled with joy and laughter. Let’s explore how to transform your rooftop into a stunning celebration space!

    Creative Themes for Rooftop Parties: Ideas For Rooftop Party Decorations And Themes

    Rooftop dinner decorations romantic homemydesign party eiffel tower dining get

    Rooftop parties offer a unique venue to celebrate with friends while enjoying stunning views and fresh air. The ambiance can be elevated through thematic decorations that not only set the mood but also create unforgettable experiences. Below are some creative themes that can transform your rooftop into a magical escape, along with essential elements that capture the essence of each concept.

    Tropical Paradise

    Transform your rooftop into a lush tropical oasis filled with vibrant colors and exotic decor. The Tropical Paradise theme invites guests to relax under palm trees and enjoy fruity cocktails, creating a vacation-like atmosphere right in the heart of the city.Essential elements for a Tropical Paradise theme include:

    • Decorative Palm Trees: Use artificial or potted palm trees to set the tropical tone.
    • Colorful Tableware: Bright plates, cups, and napkins featuring tropical patterns enhance the festive spirit.
    • Floral Arrangements: Incorporate bright flowers such as hibiscus and orchids in centerpieces.
    • Lighting: String lights or tiki torches create a warm, inviting glow after sunset.
    • Themed Cocktails: Serve drinks like piña coladas and mojitos in coconut cups for a fun touch.

    Imagine a scene adorned with lush greenery, twinkling lights, and guests sipping on cocktails while island tunes play softly in the background, creating an ambiance of pure relaxation and joy.

    Garden Escape

    The Garden Escape theme brings the essence of a serene garden to your rooftop. This concept is perfect for those who love nature and want to create a peaceful retreat filled with fresh blooms and greenery.Key components of the Garden Escape theme include:

    • Natural Decor: Use wooden furniture, wicker chairs, and rustic tables to enhance the garden feel.
    • Potted Plants and Flowers: Incorporate various potted plants and flowering arrangements throughout the space.
    • Natural Fabrics: Use tablecloths and cushions made of burlap or linen to add an organic touch.
    • Soft Lighting: Use lanterns, fairy lights, and candles to create a cozy evening atmosphere.
    • Herb-infused Drinks: Serve drinks infused with fresh herbs like mint or basil for a refreshing twist.

    Visualize an enchanting rooftop adorned with fragrant flowers, soft cushions, and the gentle flicker of candlelight, inviting guests to unwind in a peaceful garden setting away from the urban hustle.

    Movie Night Under the Stars

    The Movie Night Under the Stars theme transforms your rooftop into a cozy open-air cinema, perfect for film enthusiasts and casual viewers alike. This theme combines the fun of cinema with the beauty of a night sky, creating an unforgettable viewing experience.Essentials for a Movie Night Under the Stars include:

    • Screen Setup: Use a projector and a large screen or a blank wall for movie projection.
    • Comfortable Seating: Provide blankets, cushions, and bean bags for a comfortable viewing experience.
    • Popcorn Bar: Create a popcorn station with various toppings for guests to customize their snacks.
    • String Lights: Hang string lights to illuminate the space and add a magical touch.
    • Cozy Blankets: Offer cozy throws for guests to snuggle up as the evening cools down.

    Picture a starry night where friends gather on soft blankets, munching on popcorn while an iconic film plays in the background, all under the twinkling lights of the city sky.

    Essential Decor Items for Rooftop Celebrations

    Creating an enchanting atmosphere for a rooftop party involves selecting decor items that not only elevate the aesthetic but also enhance the overall experience of the guests. The right decorations can transform an ordinary space into a vibrant celebration zone, making it unforgettable. Here, we will explore essential decor items that set the tone for rooftop festivities while providing innovative DIY ideas to personalize the space.String lights and lanterns are pivotal in establishing a warm, inviting ambiance as night falls.

    These elements create a cozy atmosphere while ensuring visibility without being too harsh. Table centerpieces add a touch of elegance and can reflect the theme of the party, whether it’s a casual get-together or a glamorous soiree.

    Must-Have Decor Items, Ideas for rooftop party decorations and themes

    To create a captivating rooftop setup, several decor items are essential. Below is a list of must-have items that should be included in your rooftop party planning:

    • String Lights: These twinkling lights can be draped across railings or hung overhead to create a magical glow.
    • Lanterns: Available in various styles, lanterns can be placed on tables or hung to enhance the theme and provide additional lighting.
    • Table Centerpieces: Unique centerpieces can be crafted using flowers, candles, or themed decorations that resonate with the party’s vibe.

    Each of these items plays a significant role in creating an enchanting environment that amplifies the rooftop experience.

    Innovative DIY Decoration Ideas

    DIY decorations not only add a personalized touch but also allow for creativity and resourcefulness. Here are some innovative ideas that guests can replicate easily:

    • Marquee Letters: Create large marquee letters using cardboard and string lights to display a fun message or initials. This makes for a stunning focal point.
    • Painted Terracotta Pots: Use colorful paints to decorate terracotta pots, then fill them with seasonal flowers or herbs to use as table centerpieces.
    • Customized Table Runners: Use fabric, burlap, or even paper to create unique table runners that reflect the theme, enhancing the overall decor.

    These DIY projects not only foster creativity but also enable guests to engage with the decorations, making the event more memorable.

    Materials Checklist for Decorations

    Having a checklist of materials can streamline the decorating process, ensuring that no essential item is overlooked. The following table Artikels the necessary materials for each decoration idea presented:

    Decoration Item Materials Needed
    String Lights String lights, extension cords, clips for hanging
    Lanterns Lanterns (various sizes), candles or LED lights, hanging hooks
    Table Centerpieces Vases or pots, flowers or greenery, decorative stones
    Marquee Letters Cardboard, LED string lights, scissors, glue
    Painted Terracotta Pots Terracotta pots, paint, brushes, flowers or herbs
    Customized Table Runners Fabric or paper, scissors, fabric paint or markers

    This checklist serves as a handy reference to ensure all materials are on hand, enabling a smooth and enjoyable decorating experience for your rooftop celebration.

    Seasonal Decorations for Rooftop Events

    Adapting rooftop decorations according to the seasons enhances the overall experience, creating a unique atmosphere that resonates with the time of year. Seasonal decorations not only reflect the beauty of nature but also provide a fresh approach to event aesthetics, ensuring that each gathering feels distinct and memorable.When planning rooftop events, it is essential to consider the specific characteristics of each season.

    From vibrant summer colors to the warm tones of autumn, each season offers a palette and style that can elevate any gathering. Seasonal flowers and decor elements play a crucial role in establishing a theme that aligns with the changing environment. Below is a breakdown of how to incorporate seasonal elements into your rooftop celebrations.

    Summer Rooftop Decorations

    Summer rooftop events thrive on vibrant colors and fresh flowers, perfectly reflecting the season’s lively spirit. Bright hues like yellows, pinks, and blues dominate the decor.

    • Utilize potted plants and hanging flower baskets filled with seasonal blooms such as sunflowers, zinnias, and marigolds to create a cheerful ambiance.
    • Incorporate colorful table linens and bright cushions on seating arrangements to invite relaxation and joy.
    • String fairy lights or lanterns across the space to enhance the evening atmosphere, adding a magical touch as the sun sets.

    Fall Rooftop Decorations

    As the leaves change, fall decorations embrace warm, earthy tones and textures, creating a cozy environment. Rich oranges, browns, and deep reds become the focal points.

    • Use seasonal flowers such as chrysanthemums, asters, and dahlias arranged in rustic vases to capture the essence of fall.
    • Incorporate natural elements like pumpkins, gourds, and fallen leaves as centerpieces for tables, adding a touch of autumn charm.
    • Consider warm throw blankets and cushions in plaid patterns to provide comfort and warmth as temperatures drop.

    Winter Rooftop Decorations

    Winter events can be transformed into a winter wonderland using cool colors and elegant decor. Shades of white, silver, and deep blues create a serene and sophisticated atmosphere.

    • Opt for evergreen branches, holly, and winter blooms like poinsettias and amaryllis for arrangements that evoke the season.
    • Incorporate twinkling lights with snowflake motifs and metallic accents to reflect the magic of winter nights.
    • Use faux fur throws and metallic accents on seating for an inviting and luxurious feel, perfect for winter gatherings.

    Spring Rooftop Decorations

    Spring brings a sense of renewal with its soft colors and fresh blooms, making it ideal for uplifting events. Pastels like lavender, mint green, and soft pink are predominant.

    • Feature an array of seasonal flowers like tulips, daffodils, and hyacinths arranged in light, airy vases that celebrate the season’s freshness.
    • Add touches of greenery with ferns and decorative moss that symbolize new beginnings and growth.
    • Incorporate light fabrics for table settings and draping that reflect the airy and bright nature of spring.

    “Seasonal decorations not only reflect the beauty of nature but also provide a fresh approach to event aesthetics.”

    By thoughtfully incorporating seasonal decorations, rooftop events can be tailored to celebrate the unique characteristics of each time of year. The right flowers, colors, and decorative elements contribute significantly to the overall experience, ensuring your gatherings are both beautiful and memorable.

    Interactive Decor Elements for Guest Engagement

    Ideas for rooftop party decorations and themes

    Creating an unforgettable rooftop party experience goes beyond just great music and delicious food; it involves engaging your guests through interactive decor elements. These elements not only encourage participation but also create memorable moments that guests will cherish long after the event. From DIY stations to photo booths, let’s explore how you can enhance guest interaction with creative decor.

    Photo Booths

    A photo booth is a quintessential interactive decor element that allows guests to capture memories in fun and creative ways. Setting up a photo booth requires careful planning to ensure it is both functional and visually appealing.

    1. Choose a Theme

    Select a backdrop that complements your party’s theme, such as a floral arch for a garden party or a city skyline for an urban vibe.

    2. Gather Props

    Provide a variety of props that align with the theme. Items like hats, glasses, and signs can make the experience more engaging.

    3. Camera Setup

    Use a good quality camera or smartphone in a stable position. Consider a tripod for stability and ensure good lighting.

    4. User-Friendly Interface

    If using a digital setup, utilize a tablet with a simple interface for guests to take photos easily.

    “A well-designed photo booth can become the centerpiece of your rooftop party, drawing guests in for unforgettable snapshots.”

    DIY Decoration Stations

    DIY decoration stations allow guests to express their creativity while making personalized keepsakes. These stations can be both decorative and functional, enhancing the overall party atmosphere.

    1. Select Craft Options

    Choose easy-to-make decorations such as friendship bracelets, custom coasters, or painted plant pots.

    2. Setup the Space

    Designate a corner of the rooftop with tables for crafting, ensuring there are enough supplies and tools for everyone.

    3. Instructions

    Provide clear, visual instructions for each craft option to guide guests in their creations.

    4. Display Finished Products

    Set up a display area for completed crafts to encourage guests to showcase their work, adding an interactive gallery element.

    “Interactive craft stations not only serve as entertainment but also foster conversations and connections among guests.”

    Interactive Drink Stations

    Transforming your drink service into an interactive experience can elevate the party atmosphere while engaging guests.

    1. Build Your Own Cocktail Bar

    Set up a bar with various mixers, garnishes, and recipes. Provide guests with the tools to create their cocktails.

    2. Signature Drink Station

    Offer a selection of ingredients for guests to customize their signature drink, allowing for personal touches.

    3. Tasting Stations

    Incorporate taste testing for various drinks, such as flavored syrups or local brews, encouraging guests to explore different options.

    4. Aesthetic Presentation

    Use stylish glassware and vibrant garnishes that align with your party’s theme to make the drink station visually appealing.

    “An interactive drink station fosters social interactions, allowing guests to mingle as they mix and create.”

    Interactive Games

    Incorporating games into your rooftop party decor can create a lively atmosphere while encouraging guest participation.

    1. Giant Jenga

    Set up a large Jenga game using wooden blocks that guests can stack and topple, encouraging teamwork and laughter.

    2. Outdoor Trivia

    Organize a trivia game related to the party theme, using trivia cards and a designated game master to facilitate.

    3. Scavenger Hunt

    Create a scavenger hunt with themed clues that lead guests around the rooftop, promoting interaction and exploration.

    4. Aesthetic Appeal

    Decorate game areas with cohesive decor elements, ensuring the games blend seamlessly into the overall party theme.

    “Interactive games are a fantastic way to break the ice among guests, making conversations flow more easily.”

  • How to maintain plants on a rooftop garden effectively

    How to maintain plants on a rooftop garden effectively

    How to maintain plants on a rooftop garden is not just about aesthetics; it’s an art that transforms urban spaces into lush havens. In cities where concrete reigns, rooftop gardens provide a breath of fresh air, offering a sanctuary for both greenery and well-being. This guide delves into the essential aspects of maintaining a thriving rooftop garden, from choosing the right plants to mastering irrigation techniques.

    With the right approach, your rooftop can flourish beautifully, even amidst the challenges of limited soil and urban heat. Here, we will explore optimal plant selections, efficient watering systems, and practical maintenance strategies, ensuring your green oasis thrives year-round.

    Plant Selection for Rooftop Gardens

    How to maintain plants on a rooftop garden

    Choosing the right plants for a rooftop garden is crucial for ensuring a thriving green space. Rooftop gardens often experience unique challenges, such as limited soil depth, exposure to wind, and varying sunlight conditions. Selecting suitable plant varieties can enhance the vibrancy and sustainability of these elevated gardens while contributing to urban biodiversity.

    Suitable Plant Varieties for Rooftop Environments

    When it comes to plant selection for rooftop gardens, it’s essential to consider varieties that can withstand harsh conditions. Some of the best choices include:

    • Succulents: These drought-resistant plants store water in their leaves, making them ideal for limited soil environments. Varieties like Sedum and Echeveria are popular for their resilience and low maintenance.
    • Herbs: Many herbs, such as thyme, rosemary, and oregano, flourish in rooftop gardens, providing culinary benefits alongside their aesthetic appeal. They thrive in warm, sunny conditions and require minimal watering.
    • Perennials: Plants like lavender and coneflower can endure challenging conditions while adding color and fragrance to the rooftop. Their deep root systems help anchor them in place and access water efficiently.

    Drought-Resistant Plants for Limited Soil

    Drought-resistant plants are essential for rooftop gardens, especially those with shallow soil depths. These plants not only survive but also flourish in environments with limited water availability.

    • Agave: Known for its striking rosettes, agave requires minimal water and can thrive in poor soil conditions.
    • Ornamental Grasses: Varieties like Blue Fescue and Feather Reed Grass adapt well to drought and provide texture and movement in the garden.
    • Native Wildflowers: Plants like Black-eyed Susan and Purple Coneflower are adapted to local climates and require less water and care, making them perfect for rooftop settings.

    Benefits of Native Plants for Urban Rooftop Gardens

    Incorporating native plants into rooftop gardens brings numerous advantages, particularly in urban settings where biodiversity is often limited. Native species are adapted to the local environment, making them more resilient and easier to maintain.

    • Lower Water Needs: Native plants typically require less irrigation once established, conserving water resources in urban landscapes.
    • Support for Local Wildlife: These plants attract pollinators such as bees and butterflies, fostering biodiversity and ecological balance in the city.
    • Soil Health Improvement: Native plants can enhance soil quality through their root systems, which promote microbial activity and nutrient cycling.

    “Using native plants in rooftop gardens not only aids in conservation but also creates a thriving ecosystem, benefiting both plants and wildlife.”

    By selecting appropriate plant varieties, particularly drought-resistant and native species, rooftop gardens can become sustainable and vibrant green spaces that enhance urban living.

    Watering Techniques and Irrigation Systems

    In a rooftop garden, implementing effective watering techniques is crucial to ensure the health and vitality of plants. Due to limited soil depth and exposure to the elements, these gardens require specially designed systems that optimize water usage while providing adequate moisture to the plants. Understanding the best irrigation practices can dramatically affect the growth and sustainability of your rooftop garden.Efficient watering methods not only conserve water but also enhance plant growth.

    Rooftop gardens often face challenges such as heat, wind, and limited access to resources, making proper irrigation systems essential. By utilizing techniques like drip irrigation and monitoring soil moisture, gardeners can maintain optimal hydration levels without over-watering.

    Drip Irrigation System Design

    A drip irrigation system is highly efficient for rooftop gardens, delivering water directly to the plant roots and minimizing evaporation. This system can be designed using a few simple components that are easily accessible. Key components of a basic drip irrigation system include:

    • Water Source: Connect to a nearby faucet or rainwater collection system.
    • Main Line Tubing: Use durable tubing to transport water from the source to the garden beds.
    • Drip Emitters: Install emitters at intervals along the main line to release water slowly near the roots of each plant.
    • Filter: Include a filter to keep sediments from clogging the emitters.
    • Pressure Regulator: Ensure the water pressure is suitable for the emitters to function correctly.

    The setup can be customized based on the layout of the garden and the types of plants to be watered.

    Watering Schedules Based on Plant Types

    Different plant species have varied moisture requirements, making a tailored watering schedule essential for their health. Understanding these needs ensures that plants receive sufficient water without the risk of root rot or other issues.For instance, here are some general watering schedules categorized by plant types:

    • Succulents and Cacti: Water every 2-3 weeks, allowing the soil to dry completely between watering.
    • Herbs: Water once a week, ensuring the top inch of soil remains moist.
    • Vegetables: Water 2-3 times a week, particularly during fruiting stages when moisture is crucial for development.
    • Flowering Plants: Water every 4-5 days; these often require more moisture to sustain blooms.

    Monitoring rainfall and adjusting schedules accordingly is also recommended to avoid over-saturation.

    “A well-designed irrigation system not only conserves water but also enhances the beauty and health of your rooftop garden.”

    Soil and Nutrient Management

    How to maintain plants on a rooftop garden

    Establishing a thriving rooftop garden requires a solid foundation, and that begins with the right soil and nutrient management. The unique conditions of a rooftop environment necessitate careful consideration of soil composition and nutrient delivery to support plant health and growth. By selecting appropriate soil mixtures, utilizing organic fertilizers, and routinely testing soil nutrients, you can create an optimal growing environment for your rooftop plants.

    Soil Mixture Selection for Container Gardens

    Choosing the right soil mixture for container gardens is crucial as it directly impacts plant health and growth. A well-balanced soil mix ensures proper drainage, aeration, and nutrient availability. For rooftop gardens, consider the following components when creating or purchasing a soil mixture:

    • Organic Matter: Incorporating compost or well-rotted manure enhances soil structure, provides nutrients, and promotes beneficial microbial activity.
    • Drainage Material: Add perlite, vermiculite, or coarse sand to improve drainage, preventing waterlogging in containers.
    • Soil Base: Use a high-quality potting soil that is lightweight yet retains moisture effectively, ensuring root health.
    • pH Level: Aim for a pH range of 6.0 to 7.0, which is suitable for most vegetables and herbs commonly grown in rooftop gardens.

    Organic Fertilizers for Rooftop Plants

    Organic fertilizers play an essential role in maintaining soil fertility in rooftop gardens. They provide a slow release of nutrients and improve soil health without the risk of chemical buildup. Here are suitable organic fertilizers for rooftop plants:

    • Compost Tea: A nutrient-rich liquid fertilizer brewed from compost, providing a diverse array of nutrients and beneficial microorganisms.
    • Fish Emulsion: A high-nitrogen liquid fertilizer derived from fish, ideal for leafy greens and promoting lush growth.
    • Bone Meal: A slow-release source of phosphorus, beneficial for root development and flowering plants.
    • Worm Castings: Packed with nutrients and beneficial microbes, worm castings improve soil structure and fertility.

    Testing and Amending Soil Nutrients

    Regular testing of soil nutrients is vital to ensure optimal plant growth in your rooftop garden. Soil tests can help identify nutrient deficiencies and allow for appropriate amendments. The following steps Artikel how to effectively test and amend soil nutrients:

    • Soil Testing Kits: Use commercially available soil testing kits to assess pH and nutrient levels such as nitrogen, phosphorus, and potassium.
    • Interpreting Results: Compare test results with the nutritional needs of your plants to determine if amendments are necessary.
    • Amending Soil: Based on test results, incorporate organic amendments such as compost, bone meal, or specific organic fertilizers to rectify deficiencies.
    • Periodic Testing: Conduct soil tests every 6 to 12 months to monitor nutrient levels and adjust your fertilization strategy accordingly.

    Maintenance and Pest Control: How To Maintain Plants On A Rooftop Garden

    Maintaining a rooftop garden is essential for its long-term success and health. Regular maintenance tasks not only promote the growth of your plants but also help in early detection and management of pests that can threaten your garden. This section will provide a comprehensive checklist for routine maintenance, delve into organic pest control methods suitable for urban gardens, and detail the identification and management of common pests.

    Regular Maintenance Checklist for Rooftop Plants

    A consistent maintenance routine is crucial for the vitality of rooftop gardens. Below is a checklist of tasks to be performed regularly to ensure optimal growth and health of your plants:

    • Watering: Regularly check moisture levels in the soil, ensuring plants receive adequate water, particularly during dry spells.
    • Pruning: Trim dead or overgrown branches and leaves to encourage growth and prevent disease.
    • Fertilizing: Apply organic fertilizers as needed based on the plants’ nutritional requirements.
    • Weeding: Regularly remove weeds that compete for nutrients and water.
    • Pest Inspection: Frequently monitor plants for any signs of pests or diseases.
    • Cleaning: Remove debris and fallen leaves that may harbor pests or diseases.
    • Seasonal Adjustments: Prepare plants for seasonal changes, including protection from extreme weather conditions.

    Organic Pest Control Methods for Urban Gardens, How to maintain plants on a rooftop garden

    Implementing organic pest control methods is essential for maintaining a healthy rooftop garden without harmful chemicals. These methods help protect the ecosystem while effectively managing pest populations.

    • Companion Planting: Utilize plants that naturally repel pests. For instance, marigolds can deter nematodes and aphids.
    • Natural Predators: Encourage beneficial insects like ladybugs and lacewings, which feed on common pests such as aphids and mites.
    • Neem Oil: This organic pesticide disrupts the life cycle of pests and is safe for most plants.
    • Garlic Spray: A mixture of garlic and water can deter a variety of pests due to its strong scent.
    • Homemade Insecticidal Soap: A solution of soap and water can help control soft-bodied insects like aphids and spider mites.

    Identifying and Managing Common Rooftop Garden Pests

    Understanding how to identify common pests in rooftop gardens allows for quick intervention and management. Below are some prevalent pests and methods for addressing them.

    • Aphids: Small, soft-bodied insects that suck sap from plants. Look for curled leaves and sticky residue (honeydew). Control them using natural predators or insecticidal soap.
    • Spider Mites: Tiny arachnids that thrive in hot, dry conditions. Signs include webbing and stippled leaves. Increase humidity and use neem oil to manage outbreaks.
    • Whiteflies: Small white insects that can cause yellowing leaves. They can be managed with sticky traps and insecticidal soap.
    • Slugs and Snails: These pests can create significant damage by eating leaves. Handpicking and egg shells scattered around plants can deter them.

    “An ounce of prevention is worth a pound of cure.” Regular maintenance and monitoring can prevent pest infestations before they escalate.

    Maintaining a rooftop garden requires diligence and knowledge of both plant care and pest management. By following these practices, urban gardeners can enjoy a thriving green space high above the bustling city.

  • How to design a rooftop garden effectively for urban living

    How to design a rooftop garden effectively for urban living

    How to design a rooftop garden effectively is a quest for many urban dwellers looking to bring a slice of nature into their high-rise lifestyle. With limited space and unique environmental challenges, creating a thriving rooftop garden requires thoughtful planning and creativity. This guide will delve into essential considerations like location choices, plant selection, layout design, and sustainable practices that can transform your rooftop into a lush oasis.

    By understanding the dynamics of sunlight and wind, you can choose the perfect spot and the right plants that thrive in rooftop conditions. From organizing pathways to incorporating cozy seating areas, the layout of your garden is crucial for both aesthetics and accessibility. Additionally, implementing eco-friendly practices will not only benefit your garden but also contribute to a healthier urban ecosystem.

    Choosing the Right Location for a Rooftop Garden

    How to design a rooftop garden effectively

    Selecting the ideal location for a rooftop garden is a crucial step in ensuring its success. Various factors influence the ability of plants to thrive in this unique environment, including sunlight availability, wind patterns, and the structural integrity of the rooftop itself. Understanding these elements will help in creating a flourishing green oasis high above the ground.The first consideration when determining the location for a rooftop garden is the availability of sunlight.

    Plants require varying amounts of light to grow, and understanding how sunlight interacts with your rooftop environment will guide your plant selections. In urban settings, taller buildings or surrounding structures can cast shadows, creating areas of shade at different times of the day. Conducting a sunlight analysis will allow you to identify which parts of your rooftop receive full sun and which areas may be more suitable for shade-tolerant plants.

    Factors Influencing Sunlight and Shade

    When assessing potential garden areas, several key factors affect sunlight exposure:

    • Orientation of the Roof: South-facing roofs typically receive the most sunlight throughout the day, whereas north-facing roofs may experience more shade.
    • Surrounding Structures: Nearby buildings, trees, and other obstructions can create shadows, impacting the amount of direct sunlight that reaches your garden.
    • Seasonal Variations: The angle of the sun changes with the seasons, meaning certain areas may receive more sunlight in summer and less in winter.

    Understanding these factors will help in planning the layout of your rooftop garden and selecting appropriate plants that match the light conditions.Wind patterns are another crucial element to consider when designing a rooftop garden. Rooftops are often exposed to higher wind speeds than ground-level gardens, which can affect plant health and overall garden design. Wind can lead to physical damage to delicate plants and can also cause increased evaporation rates, leading to drought stress.

    Impact of Wind Patterns

    Considering wind patterns will guide you in creating a resilient garden that withstands harsh conditions. Here are important aspects to consider:

    • Windbreaks: Incorporating windbreaks, such as trellises or taller plants, can help shield more delicate plants from strong gusts.
    • Plant Selection: Choosing wind-resistant plants, such as low-growing perennials and hardy shrubs, can enhance the stability of your garden.
    • Garden Layout: Arranging plants in layers can help reduce wind exposure for smaller, more sensitive species.

    By strategically planning around wind conditions, you can create a more sustainable rooftop garden environment.Finally, the structural integrity of the rooftop is paramount. Before embarking on your gardening journey, it’s essential to ensure that the building can support the weight of the garden, including soil, plants, and any additional features like furniture or pathways. Consulting with a structural engineer or building professional can provide valuable insights into the load-bearing capacity of your rooftop.

    Importance of Structural Integrity

    When considering structural integrity, several factors must be addressed:

    • Weight Limitations: Ensure that the rooftop can accommodate the weight of garden soil, plants, and water without compromising safety.
    • Drainage Systems: A well-designed drainage system is crucial to prevent water accumulation, which can lead to structural damage.
    • Access Points: Ensure that there are safe and accessible ways to transport soil, plants, and gardening tools to and from the rooftop.

    By prioritizing structural integrity, you can create a sustainable rooftop garden that not only enhances your living space but also supports healthy plant growth.

    Selecting Appropriate Plants for Rooftop Gardens

    Creating a thriving rooftop garden starts with choosing the right plants that can withstand the unique challenges of urban environments. Rooftop gardens often experience harsher conditions than traditional ground gardens, including limited soil depth, exposure to wind, and intense sunlight. Selecting plants that are resilient and adaptable to these conditions is crucial for establishing a sustainable green space. This section explores the best plant options for rooftop gardens, focusing on drought resistance, seasonal variations, and the advantages of using native plants.

    Drought-Resistant Plants for Rooftop Gardens

    In rooftop gardens, water conservation is essential. Drought-resistant plants not only thrive in dry conditions but also require less maintenance and reduce the frequency of irrigation. Here is a selection of drought-tolerant plants suitable for rooftop environments:

    • Agave: Known for their striking forms, agaves store water in their leaves, making them ideal for dry conditions.
    • Sedum: These succulents come in various colors and textures, thriving in poor, dry soil while adding visual interest.
    • Lavender: With its aromatic foliage and beautiful blooms, lavender is both drought-resistant and attracts pollinators.
    • Thyme: A hardy herb, thyme is resilient and can thrive in rocky or sandy soil, providing culinary benefits as well.
    • Russian Sage: This perennial offers a lovely purple hue and tolerates drought well while attracting beneficial insects.

    When selecting plants, it’s important to consider their water needs and growth habits to ensure they are well-suited for the rooftop’s microclimate.

    Considerations for Seasonal Variations and Plant Growth Cycles

    Understanding seasonal variations is essential for successful rooftop gardening. Plant growth cycles can be influenced by temperature fluctuations, light availability, and precipitation patterns. Being aware of these factors allows gardeners to select plants that will thrive year-round.

    The following considerations are important when planning for seasonal changes:

    • Spring: This is an optimal time for planting, as most plants will establish roots and begin their growth cycle. Choose early bloomers to enjoy vibrant colors.
    • Summer: Summer heat can stress plants, so selecting heat-tolerant varieties is key. Regular monitoring and watering during this period ensure plant health.
    • Autumn: This season allows for planting perennials that will come back in the spring, and a focus on fall-blooming plants can extend the garden’s beauty.
    • Winter: While many plants go dormant, using evergreens or plants with winter interest can keep a rooftop garden visually appealing even in colder months.

    Keeping track of these seasonal patterns helps in timing plant care and maintenance effectively.

    Benefits of Using Native Plants in Urban Rooftop Gardens

    Incorporating native plants into rooftop gardens provides several ecological and aesthetic benefits. Native species are those that naturally occur in a specific region and are well-adapted to local soil and climate conditions. Utilizing these plants can significantly enhance the sustainability of urban gardens.

    The advantages of using native plants include:

    • Low Maintenance: Native plants typically require less care, as they are adapted to local environmental conditions.
    • Biodiversity Support: They attract local pollinators and wildlife, contributing to urban biodiversity and ecological balance.
    • Soil Health Improvement: Native plants often have deep root systems that enhance soil structure and water retention, which is beneficial for rooftop setups.
    • Resilience Against Pests: These plants have evolved with local insects and diseases, making them less susceptible to infestations and promoting a healthier garden ecosystem.

    By choosing native species, rooftop gardeners can create vibrant, sustainable, and low-maintenance green spaces that contribute positively to their urban environment.

    Designing Layout and Accessibility in Rooftop Gardens

    Creating a rooftop garden requires careful planning to maximize space while ensuring accessibility and aesthetic appeal. A well-thought-out layout not only enhances the visual experience but also promotes ease of movement and maintenance. This section will cover effective strategies for organizing plant beds, designing walkways, and incorporating seating areas into your rooftop garden.

    Organizing Plant Beds and Walkways

    Proper organization of plant beds and walkways is essential for a functional rooftop garden. First, consider the dimensions and shape of your rooftop space. A step-by-step plan can include the following:

    1. Measure the Available Space

    Take precise measurements of your rooftop to understand the layout.

    2. Create a Design Blueprint

    Sketch a layout that incorporates plant beds, walkways, and seating areas.

    3. Determine Plant Bed Sizes

    Decide on the size and shape of your plant beds, ensuring they allow for easy access for maintenance.

    4. Plan Walkway Width

    Design walkways that are at least 2 feet wide to enable comfortable movement.

    5. Incorporate Accessibility Features

    Include ramps or wider paths for easy navigation, especially if your rooftop will be used by individuals with mobility challenges.Use this organized approach to navigate the unique layout of your rooftop space while ensuring that all areas are accessible.

    Incorporating Seating and Relaxation Areas

    Seating and relaxation areas are crucial to enjoying your rooftop garden. The goal is to create inviting spots that allow for leisure and enjoyment of the green space. To incorporate these areas effectively:

    Select Comfortable Furniture

    Choose weather-resistant seating such as lounge chairs, benches, or hammocks that suit the garden’s theme.

    Position Strategically

    Place seating areas in shaded spots or near fragrant plants for a pleasant atmosphere.

    Create Defined Spaces

    Use plant beds or decorative screens to delineate relaxation areas from other garden sections.By thoughtfully positioning seating, you can create a serene retreat that encourages relaxation amidst the greenery.

    Maximizing Space with Vertical Gardening Solutions

    Vertical gardening is an innovative way to maximize limited rooftop space while adding visual interest. To implement vertical gardening solutions:

    Select Appropriate Structures

    Utilize trellises, vertical planters, or wall-mounted systems to support climbing plants and herbs.

    Plan for Light and Water

    Ensure that vertical gardens receive adequate sunlight and consider a drip irrigation system to maintain moisture levels.

    Choose Suitable Plant Varieties

    Opt for plants that thrive in vertical arrangements, such as vining plants, ferns, or even edible varieties like tomatoes and cucumbers.Vertical gardening not only increases the available planting area but also creates a lush, green backdrop that enhances the overall aesthetic of your rooftop garden.

    Implementing Sustainable Practices in Rooftop Gardening: How To Design A Rooftop Garden Effectively

    How to design a rooftop garden effectively

    Sustainable practices in rooftop gardening are essential for creating an eco-friendly space that contributes to urban biodiversity, conserves resources, and enhances the health of the environment. By incorporating water conservation techniques, promoting soil health through composting, and attracting beneficial wildlife, rooftop gardens can flourish while minimizing their ecological footprint.

    Effective Water Conservation Techniques

    Water conservation is crucial in maintaining a sustainable rooftop garden, especially in urban areas where water can be a limited resource. Implementing rainwater harvesting systems can significantly reduce reliance on municipal water supplies. By capturing and storing rainwater, gardeners can utilize this natural resource for irrigation, thereby minimizing water waste. Additionally, employing drip irrigation systems allows for targeted watering, reducing evaporation and runoff.

    These systems deliver water directly to the plant roots, ensuring efficient usage. Mulching is another effective technique that retains soil moisture and suppresses weeds, preventing the need for excessive watering.

    The Role of Composting and Soil Health

    Maintaining healthy soil is fundamental to the success of any garden. In rooftop gardens, composting plays a vital role in enriching the soil while promoting sustainable practices. Compost provides essential nutrients to plants, enhances soil structure, and improves moisture retention. Creating a composting system on the rooftop can be straightforward, involving kitchen scraps, yard waste, and other organic materials. This not only reduces waste but also creates a nutrient-rich amendment for the garden.

    Regularly incorporating compost into the soil can lead to improved growth rates and increased resilience against pests and diseases.

    Attracting Beneficial Wildlife and Pollinators, How to design a rooftop garden effectively

    Encouraging beneficial wildlife and pollinators is a key aspect of sustainable rooftop gardening. By creating habitats that attract bees, butterflies, and birds, gardeners can enhance the biodiversity of their rooftop space, thereby supporting the ecosystem. Planting native flowering plants that bloom at different times during the growing season provides a consistent food source for pollinators. Additionally, incorporating elements such as birdhouses, bee hotels, and shallow water dishes can offer shelter and sustenance for various wildlife.

    By fostering an environment that welcomes beneficial creatures, rooftop gardens can improve pollination rates, which is essential for fruit and vegetable production, and contribute to overall ecosystem health.