Tag: energy efficiency

  • Rooftop heating solutions for colder climates

    Rooftop heating solutions for colder climates

    Rooftop heating solutions for colder climates offer innovative ways to combat the chill of frigid temperatures, transforming rooftops into efficient thermal shields. As winter descends and temperatures plummet, the need for effective heating systems becomes paramount, driving homeowners and businesses alike to seek out reliable solutions. From versatile heating mats to advanced hydronic systems, these rooftop technologies not only enhance comfort but also promise energy efficiency and resilience against harsh weather.

    Understanding the various types of rooftop heating solutions is crucial for making informed decisions. These systems, designed specifically for colder climates, provide warmth and safety while minimizing energy consumption. Moreover, the right materials and installation methods can play a vital role in maximizing the benefits of these heating solutions, ensuring they perform optimally even in the most severe conditions.

    Overview of Rooftop Heating Solutions
    Rooftop heating solutions for colder climates

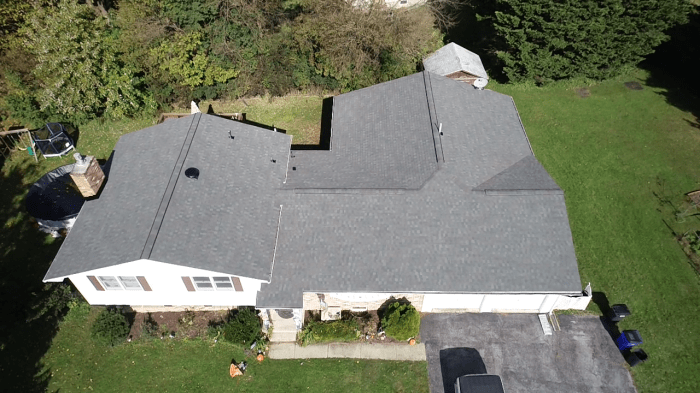
    Rooftop heating solutions are essential in colder climates, providing vital warmth and comfort for residential and commercial properties. These systems effectively prevent ice accumulation and ensure the safety and functionality of rooftops during winter months. Various heating methods are available, each with unique characteristics tailored to meet different requirements and preferences.Rooftop heating solutions can be categorized into several types, each designed to combat severe weather conditions.

    These include electric heating systems, hydronic heating systems, and heated roof panels. Electric heating systems utilize electric cables or mats installed beneath the roofing material, providing direct heating through electric resistance. Hydronic systems, on the other hand, circulate heated water through pipes embedded in the roof structure. Heated roof panels often combine various technologies, offering efficient heat distribution.

    Benefits of Using Rooftop Heating Systems

    The advantages of rooftop heating systems in extreme weather conditions extend beyond mere comfort. They significantly enhance the longevity of roofing materials by preventing ice dam formation and reducing the risk of structural damage. The following points highlight the key benefits of these systems:

    • Energy Efficiency: Modern rooftop heating solutions are designed to maximize energy use, minimizing operational costs while effectively managing heat distribution.
    • Safety: By preventing ice build-up, these systems reduce the risk of accidents related to falling ice and snow, ensuring pedestrian safety around the building.
    • Structural Integrity: Maintaining clear roofs helps protect the integrity of the roofing material and supports overall structural health, reducing maintenance costs over time.
    • Convenience: Automated systems can be programmed to operate based on weather conditions, providing consistent heating without the need for manual intervention.

    Common Materials Used in Rooftop Heating Systems, Rooftop heating solutions for colder climates

    The construction of rooftop heating systems relies on various materials that ensure durability and efficiency. Each material serves a specific purpose, contributing to the overall effectiveness of the heating system. Some of the most common materials include:

    • Electrical Cables: These cables are often made of copper or aluminum, chosen for their excellent conductivity, allowing for efficient heat generation.
    • Piping: Hydronic systems typically utilize durable materials such as PEX (cross-linked polyethylene) or copper, both known for their resistance to corrosion and ability to withstand high temperatures.
    • Insulation: High-quality insulation materials, like rigid foam or fiberglass, are crucial in reducing heat loss, ensuring that the warmth generated is effectively retained.
    • Roof Membranes: Specialized roof membranes are designed to withstand extreme temperatures and moisture, protecting the heating system while providing additional insulation.

    Properly designed and installed rooftop heating systems can significantly extend the lifespan of roofing materials and enhance safety during winter months.

    Installation Methods and Procedures
    Rooftop heating solutions for colder climates

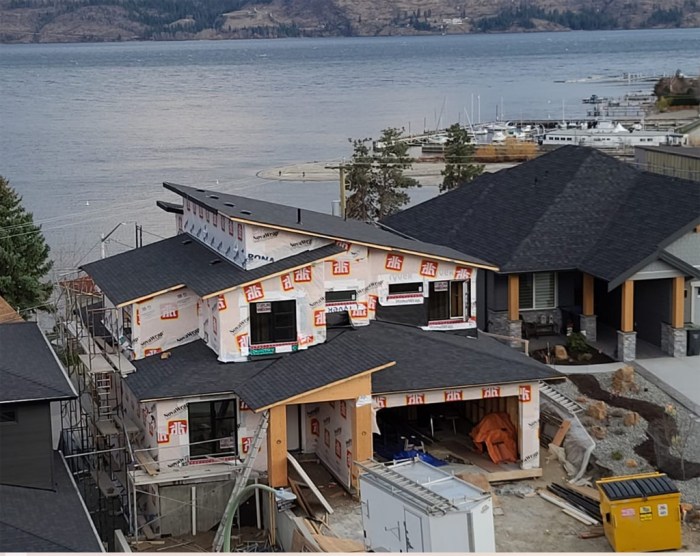
    Rooftop heating solutions are essential for ensuring comfort in colder climates. Understanding the installation methods and procedures is crucial for achieving optimal performance and longevity of the system. This section Artikels the step-by-step installation process, the tools and equipment necessary, and compares the merits of DIY installation versus professional services.

    Step-by-Step Installation Process

    Following a structured installation process ensures that the rooftop heating system functions efficiently. The installation can be broken down into the following steps:

    1. Site Assessment

    Evaluate the rooftop structure for load-bearing capacity and accessibility. Consider the orientation and local weather conditions.

    2. System Selection

    Choose the appropriate type of heating solution, such as electric or hydronic systems, based on the specific requirements and roof type.

    3. Preparation of the Roof

    Clean the installation area to remove debris and ensure a flat surface. Install insulation where required to maximize efficiency.

    4. Mounting Hardware Installation

    Secure any brackets or mounting systems that will hold the heating elements to the roof. Ensure they are properly aligned and anchored.

    5. Electrical and Plumbing Setup

    For electric systems, connect wiring according to local codes. For hydronic systems, lay out and connect the piping, ensuring proper slope for drainage.

    6. Installation of Heating Elements

    Place the heating cables or mats in the designated areas, following the manufacturer’s guidelines for spacing and overlap.

    7. Connection to Control System

    Integrate a thermostat or control panel to manage the heating system effectively. This step is crucial for ensuring user convenience.

    8. Testing the System

    Before completing the installation, test the entire system to confirm that it operates correctly and efficiently.

    9. Final Inspection

    Conduct a thorough check to ensure all components are securely installed and meet safety standards.

    Tools and Equipment Required for Installation

    To efficiently install rooftop heating solutions, certain tools and equipment are necessary. The following is a comprehensive list that will aid in the installation process:

    Safety Gear

    Hard hats, safety glasses, gloves, and harnesses to ensure worker safety.

    Measuring Tools

    Tape measure, level, and square for accurate installations.

    Power Tools

    Drill, saw, and impact driver for securing brackets and cutting materials.

    Hand Tools

    Wrenches, screwdrivers, and pliers for assembly and adjustments.

    Electrical Equipment

    Multimeter for checking electrical connections, wire strippers, and connectors.

    Plumbing Tools

    Pipe cutter, wrenches, and soldering tools for hydronic systems.

    Insulation Materials

    Foam boards or rolls for thermal insulation where necessary.

    Heating Elements

    The selected heating cables, mats, or hydronic tubing.

    Obtain direct knowledge about the efficiency of Rooftop privacy solutions for residential areas through case studies.

    DIY Installation versus Professional Installation

    Deciding between DIY installation and hiring professionals is a key consideration for homeowners. Each option has its advantages and challenges:

    DIY Installation

    Cost-effective as it eliminates labor charges.

    Provides personal satisfaction and a hands-on experience.

    Requires a good understanding of electrical and plumbing work, which may not be feasible for everyone.

    Risk of improper installation could lead to performance issues or safety hazards.

    Professional Installation

    Ensures compliance with local building codes and safety regulations.

    Professionals bring experience and expertise that can enhance system efficiency and longevity.

    Warranty on installation may cover any future issues related to workmanship.

    Higher initial costs but could save money in the long run by preventing mistakes.

    Choosing the right installation method is critical for the effectiveness and safety of rooftop heating solutions in colder climates.

    Maintenance of Rooftop Heating Systems

    Rooftop heating systems require diligent maintenance to ensure optimal performance, safety, and longevity. Regular checks not only prevent unexpected breakdowns but also enhance energy efficiency, saving costs in the long run. This section Artikels essential maintenance practices, identifies common issues, and emphasizes the significance of a proactive maintenance strategy.

    Maintenance Checklist for Rooftop Heating Solutions

    A comprehensive maintenance checklist is crucial for identifying potential issues and ensuring the system operates effectively. Regular inspections can help maintain system efficiency and reliability. Below is a detailed checklist that covers essential maintenance tasks:

    • Inspect and replace air filters regularly to ensure adequate airflow and efficiency.
    • Examine ductwork and insulation for leaks or damage.
    • Check the thermostat settings and calibrate as necessary for accurate temperature control.
    • Inspect heating cables and mats for any signs of damage or wear.
    • Clean the exterior of the heating units to prevent debris accumulation.
    • Verify that all electrical connections are secure and free from corrosion.
    • Test the system’s safety controls and shut-off mechanisms.
    • Flush the heating system annually to remove sediment buildup.
    • Schedule professional inspections at least once a year for expert evaluation.

    Common Issues and Troubleshooting for Rooftop Heating Systems

    Rooftop heating systems may encounter various problems that can affect their performance. Recognizing these issues early and knowing how to troubleshoot them can prevent further complications. Here are some common issues and their potential solutions:

    • Insufficient Heating: Often caused by dirty filters or blocked ducts. Regularly replacing filters and ensuring ducts are clear can help maintain proper airflow.
    • Frequent Cycling: This may indicate a faulty thermostat or an oversized heating unit. Check thermostat calibration and consider consulting a professional for unit sizing confirmation.
    • Strange Noises: Unusual sounds could stem from loose components or debris in the heating system. Inspect for loose parts and clear any obstructions.
    • Increased Energy Bills: A sudden spike in utility costs can suggest inefficiencies. Regular maintenance, including cleaning and inspections, can mitigate this issue.

    Importance of Regular Maintenance and Its Impact on System Efficiency

    Regular maintenance of rooftop heating systems plays a vital role in ensuring energy efficiency and extending the lifespan of the equipment. Well-maintained systems operate more effectively, leading to lower energy consumption and reduced operational costs.

    “An ounce of prevention is worth a pound of cure.”

    This adage holds true for rooftop heating systems, where proactive maintenance can prevent costly repairs and system replacements. Establishing a routine maintenance schedule fosters reliability, enhances safety, and guarantees that systems perform at peak efficiency, providing comfort during the coldest months.

    Cost Analysis and Energy Efficiency: Rooftop Heating Solutions For Colder Climates

    The financial considerations of rooftop heating solutions are crucial for homeowners and businesses in colder climates. Understanding the costs associated with various heating systems, as well as their energy efficiency ratings, allows for informed decision-making. A thorough cost analysis not only aids in budgeting but also highlights potential long-term savings through improved energy efficiency.

    Cost Breakdown of Rooftop Heating Solutions

    When evaluating rooftop heating solutions, it’s essential to consider both initial installation costs and ongoing operational expenses. Here is a detailed breakdown of common rooftop heating systems:

    • Electric Heating Systems:
      Typically range from $1,500 to $3,000 for installation, depending on the roof type and system complexity. Operational costs can vary significantly based on local electricity rates.
    • Hydronic Heating Systems:
      Installation costs generally range between $5,000 and $10,000 due to the complexity of setting up water lines and boilers. However, these systems often offer lower operational costs and can be more energy-efficient than electric systems.
    • Gas Heating Systems:
      Installation usually costs between $3,000 and $6,000. While they may have higher upfront costs, gas heating systems can provide substantial savings on utility bills, especially in areas with lower gas prices.

    Energy Efficiency Ratings of Rooftop Heating Systems

    Energy efficiency ratings are critical indicators of a system’s performance and operational cost. Various rooftop heating solutions have differing efficiency ratings, often measured using units like the Annual Fuel Utilization Efficiency (AFUE) for gas systems and the Energy Efficiency Ratio (EER) for electric systems.

    • Electric Heating Systems:
      Typically have EER ratings ranging from 8 to 12. While they are easy to install, their efficiency can be lower in extreme weather temperatures.
    • Hydronic Heating Systems:
      Generally boast higher efficiency ratings, often exceeding 90% AFUE, making them an attractive option for long-term energy savings.
    • Gas Heating Systems:
      Usually feature AFUE ratings between 80% to 98%, with higher-rated systems providing better efficiency and lower fuel consumption.

    Potential Savings from Improved Energy Efficiency

    Investing in energy-efficient rooftop heating solutions can lead to significant cost savings over time, particularly in colder climates where heating demands are high.

    “Energy-efficient systems can reduce heating costs by up to 30% compared to standard systems, translating to hundreds of dollars saved annually.”

    For example, a homeowner who switches from an old electric heating system to a modern hydronic or gas system with an AFUE rating of 95% could see their annual heating bill drop from approximately $1,500 to around $1,050, resulting in a savings of $450 each year. Over a decade, this can amount to substantial financial relief, making energy-efficient systems not only environmentally friendly but also economically viable.Investing in rooftop heating solutions with higher energy efficiency ratings not only offers immediate savings but also contributes to long-term sustainability goals, making them a wise choice for those in colder climates.
  • Cost-effective rooftop insulation options available for every budget

    Cost-effective rooftop insulation options available for every budget

    Cost-effective rooftop insulation options available reveal a wealth of opportunities for homeowners aiming to enhance energy efficiency while minimizing costs. With the increasing focus on sustainability and energy savings, selecting the right insulation can significantly impact both comfort and utility bills. This exploration delves into diverse materials, installation techniques, and the long-term savings they can provide, ensuring your rooftop is not just an overhead but a catalyst for energy efficiency.

    From traditional fiberglass to innovative reflective foams, the variety of insulation materials available presents distinct advantages and pitfalls. By understanding the energy efficiency ratings and installation methods, homeowners can make informed decisions that suit their financial and structural needs while contributing to a greener planet.

    Types of Cost-effective Rooftop Insulation

    Rooftop insulation plays a critical role in energy efficiency and maintaining comfortable indoor temperatures. Various materials are available, each with distinct properties that affect both performance and cost. Understanding these options can help homeowners make informed decisions when upgrading their insulation.When selecting insulation for rooftops, it is essential to consider the material’s thermal resistance (R-value), cost, and environmental impact. The following sections will detail several cost-effective insulation materials, their benefits and drawbacks, as well as their energy efficiency ratings.

    Fiberglass Insulation

    Fiberglass insulation is one of the most commonly used materials for rooftop insulation due to its affordability and effectiveness. It consists of tiny glass fibers that trap air, providing excellent thermal resistance.Benefits:

    • High R-value: Typically ranges from R-2.9 to R-3.8 per inch, making it effective at keeping heat in or out.
    • Cost-effective: Generally lower in price compared to other insulation types.
    • Fire-resistant: Non-combustible, adding to safety in residential buildings.

    Drawbacks:

    • Installation difficulties: Requires protective gear to avoid skin irritation and inhalation of particles.
    • Moisture retention: Can lose effectiveness if it gets wet, leading to mold growth.

    Foam Board Insulation

    Foam board insulation consists of rigid panels made from polystyrene or polyisocyanurate. It is particularly effective for flat roofs and can be installed in various thicknesses.Benefits:

    • High R-value: Typically ranges from R-3.6 to R-6.5 per inch, providing superior thermal performance.
    • Moisture-resistant: Doesn’t absorb water, making it suitable for humid environments.

    Drawbacks:

    • Cost: Generally more expensive than fiberglass insulation, especially in thicker applications.
    • Environmental impact: Manufacturing process can generate greenhouse gases.

    Reflective or Radiant Barrier Insulation

    Reflective insulation, also known as radiant barrier, is designed to reflect radiant heat away from living spaces. It is typically installed in attics to reduce cooling costs.Benefits:

    • Energy efficiency: Can reduce cooling costs by up to 20% in hot climates, particularly when installed in the roof’s rafters.
    • Lightweight: Easy to install without adding significant weight to the roof structure.

    Drawbacks:

    • Limited effectiveness: Works best in hot climates and may not be as effective in cooler regions.
    • Cost: Initial installation costs can be higher than traditional insulation types.

    Cellulose Insulation

    Cellulose insulation is made from recycled paper products treated with fire retardants. It offers a sustainable option for those looking to insulate their roofs.Benefits:

    • Eco-friendly: Made from recycled materials, reducing landfill waste.
    • Good thermal performance: R-values range from R-3.1 to R-3.7 per inch, comparable to fiberglass.

    Drawbacks:

    • Settling: Over time, cellulose can settle and lose its effectiveness unless properly installed.
    • Moisture issues: Can absorb moisture, leading to potential mold problems if not adequately ventilated.

    Mineral Wool Insulation

    Mineral wool insulation, also known as rock wool, is made from natural rock or recycled slag. It is known for its soundproofing qualities and fire resistance.Benefits:

    • Fire resistant: Can withstand high temperatures, making it a safe option for rooftops.
    • Soundproofing: Provides excellent acoustic insulation, adding to comfort.

    Drawbacks:

    • Cost: Generally more expensive than fiberglass and cellulose options.
    • Installation complexity: May require professional installation due to weight and handling requirements.

    Choosing the right insulation material for your rooftop can significantly impact energy efficiency, comfort, and overall costs. Evaluating the benefits and drawbacks of each type helps ensure a suitable selection for your needs.

    Installation Methods for Rooftop Insulation

    Cost-effective rooftop insulation options available

    Rooftop insulation is essential for maintaining energy efficiency and comfort in buildings. Understanding the different installation methods can assist homeowners and professionals alike in selecting the best approach for their specific needs. Various methods exist depending on the type of insulating material chosen, and each comes with its own set of advantages and challenges.

    Installation Methods for Different Types of Rooftop Insulation

    The installation methods for rooftop insulation vary according to the type of insulation being used. Below are some common roofing insulation materials and their respective installation techniques.

    • Fiberglass Batt Insulation: This method involves laying pre-cut fiberglass batts between the rafters or joists. The batts need to be snugly fitted without gaps to ensure maximum thermal performance. Typically, a vapor barrier is installed on the warm side of the insulation to prevent moisture buildup.
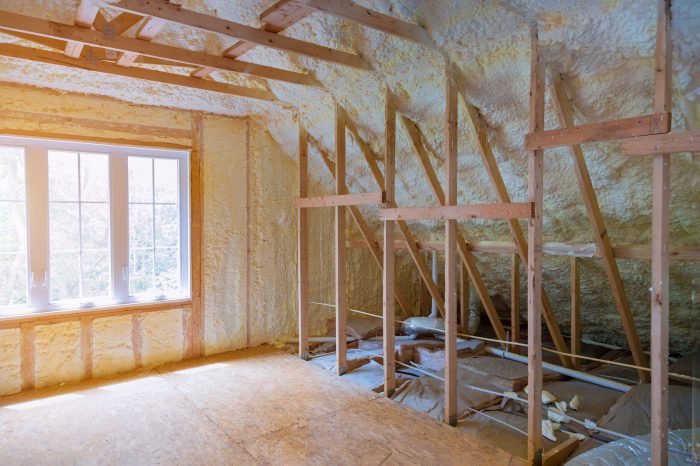
    • Spray Foam Insulation: Spray foam is applied as a liquid that expands and solidifies into a dense foam. This method requires specialized equipment for application. It’s essential to wear protective gear and ensure proper ventilation during installation due to the chemicals involved.
    • Rigid Foam Board Insulation: Rigid foam boards can be installed as continuous sheathing over the roof deck. The boards are joined with adhesive or mechanical fasteners and sealed at the seams with tape to minimize thermal bridging.
    • Mineral Wool or Rock Wool Insulation: Similar to fiberglass, mineral wool batts can be installed between joists. They are known for their fire-resistant properties and sound absorption capabilities.
    • Reflective or Radiant Barrier Insulation: This type of insulation works best in hot climates. It is typically installed on the underside of the roof deck to reflect radiant heat away from the living space. Installation involves attaching the barrier directly to the roof frame.

    Step-by-Step Guide for DIY Installation, Cost-effective rooftop insulation options available

    Installing rooftop insulation can be done by homeowners willing to put in the effort. Here is a general guide for DIY installation:

    1. Preparation

    Inspect the roof for any damage and repair as needed.

    Gather all necessary tools and materials, including safety gear, insulation, a utility knife, measuring tape, and adhesive or fasteners.

    2. Measure and Cut

    Further details about How to design a rooftop garden effectively is accessible to provide you additional insights.

    Measure the spaces where insulation will be installed to ensure precise cutting. Use a utility knife to cut the insulation to the required sizes.

    3. Install the Insulation

    For batts, fit them snugly between rafters or joists. Ensure there are no gaps. For rigid boards, apply adhesive or use fasteners to secure them to the roof deck. Seal any joints with tape.

    4. Add a Vapor Barrier

    Install a vapor barrier on the warm side if required, ensuring it covers all insulation areas.

    5. Final Checks

    Inspect the installation for gaps or unsealed areas and address any issues.

    Professional Installation Steps

    When opting for professional installation, understanding the process can provide clarity:

    1. Initial Consultation

    A contractor evaluates the roof’s condition, insulation needs, and recommends appropriate materials and methods.

    2. Preparation and Safety Measures

    Professionals prepare the site, ensuring safety protocols are in place, which may include scaffolding and safety harnesses.

    3. Material Delivery and Inspection

    Insulation materials are delivered and inspected for quality before installation begins.

    4. Installation

    Professionals proceed with the chosen insulation method, ensuring compliance with local building codes and standards.

    5. Final Inspection and Cleanup

    After installation, a thorough inspection is conducted to ensure proper application, followed by cleanup of the work area.

    Safety Precautions and Best Practices

    Installing rooftop insulation can involve risks, making safety precautions essential. Adhering to best practices ensures a successful and safe installation process.

    • Use Personal Protective Equipment (PPE): Always wear gloves, masks, and eye protection when handling insulation materials, especially spray foam.
    • Ensure Proper Ventilation: If using materials that emit fumes, ensure the area is well-ventilated to prevent inhalation of harmful substances.
    • Check Weather Conditions: Avoid installation during inclement weather to prevent accidents or the material from being compromised.
    • Follow Manufacturer Instructions: Adhering to manufacturer guidelines is crucial for the effective performance of insulation materials.
    • Employ Safe Ladder Practices: When working at heights, ensure ladders are stable and positioned correctly, and never overreach.

    Comparison of Costs for Different Insulation Options

    Rooftop insulation serves as a critical investment for enhancing energy efficiency and comfort within a building. Understanding the costs associated with various insulation materials helps homeowners and builders make informed decisions that align with budget constraints while maximizing long-term savings.The cost of insulation varies significantly based on the materials chosen, their R-values, and installation requirements. Below is a breakdown of common insulation materials alongside their average costs per square foot:

    Cost Breakdown of Popular Insulation Materials

    When evaluating the cost-effectiveness of different insulation options, it’s essential to consider both upfront costs and long-term savings. The following table provides an overview of popular insulation materials, including their estimated costs and potential long-term savings.

    Insulation Material Cost per Square Foot Average R-Value Estimated Annual Energy Savings
    Fiberglass Batts $0.50 – $1.00 2.9 – 4.3 $100 – $200
    Foam Board $1.00 – $3.00 5.0 – 6.5 $150 – $300
    Spray Foam $2.50 – $3.50 6.0 – 7.0 $200 – $400
    Mineral Wool $1.00 – $1.50 3.0 – 4.0 $120 – $250
    Cellulose $0.75 – $1.50 3.5 – 4.0 $100 – $220

    Evaluating these materials allows for a clear comparison of their cost-effectiveness, especially regarding their long-term benefits. For instance, while spray foam has a higher initial cost, its superior R-value leads to greater energy savings over time.

    Financing Options for Installing Rooftop Insulation

    Financing rooftop insulation installation can ease the financial burden associated with upfront costs. Several options are available to homeowners and property owners looking to invest in insulation:

    Home Improvement Loans

    Many banks and credit unions offer loans specifically for home renovations, including insulation upgrades. These loans typically have favorable terms and can cover the total cost of the project.

    Government Incentives

    Various federal and local programs provide tax credits or rebates for energy-efficient home improvements. Homeowners should research available incentives in their area to take advantage of these financial benefits.

    Energy-Efficiency Financing Programs

    Some utility companies offer financing options for energy efficiency improvements, often with low-interest rates or even no-interest loans. These programs are designed to encourage homeowners to invest in energy-saving upgrades.

    Personal Savings or Credit Cards

    Utilizing personal savings or credit card financing can be a quick way to cover initial costs but should be approached with caution to avoid high-interest debt.By exploring these financing options, homeowners can mitigate the costs associated with installing rooftop insulation, making it a more feasible investment for long-term energy efficiency and savings.

    Maintenance and Longevity of Rooftop Insulation: Cost-effective Rooftop Insulation Options Available

    Proper maintenance of rooftop insulation is crucial for ensuring its effectiveness and longevity. Neglecting this aspect can lead to various issues, including reduced thermal performance and increased energy costs. Understanding how to care for different types of insulation and recognizing the factors that impact their lifespan can prevent costly repairs and replacements down the line.The longevity of rooftop insulation is influenced by several factors, including the material composition, environmental conditions, and installation quality.

    Generally, high-quality insulation materials can last anywhere from 20 to 50 years, but regular maintenance is key to maximizing this lifespan. Routine inspections and timely repairs can mitigate common problems associated with rooftop insulation, ultimately extending its useful life.

    Best Practices for Maintaining Different Types of Insulation

    Different types of rooftop insulation require specific maintenance strategies to ensure their performance. Implementing these best practices can significantly contribute to the longevity of the insulation:

    • Fiberglass Insulation: Keep the area around the insulation dry and free of debris. Inspect for moisture accumulation, which can lead to mold growth and reduced effectiveness.
    • Foam Insulation: Regularly check for cracks or deterioration. Seal any gaps to prevent air leaks and moisture penetration, which can compromise insulation integrity.
    • Reflective Insulation: Ensure that the reflective surfaces are clean and free of dust or debris. This maximizes their efficiency in reflecting heat away from the building.
    • Spray Foam Insulation: Monitor for signs of wear or damage on the foam layer. Any exposed areas should be reapplied to maintain a continuous barrier against heat transfer.

    Expected Lifespan and Factors Affecting Longevity

    The lifespan of rooftop insulation varies based on several factors. Understanding these elements can help property owners make informed choices regarding insulation maintenance and replacement.

    Material Quality

    High-quality insulation materials, like closed-cell spray foam, generally last longer than lower-quality variants.

    Environmental Conditions

    Areas with extreme weather conditions, including heavy rainfall or constant exposure to sunlight, can shorten the lifespan of insulation materials.

    Installation Quality

    Proper installation is essential. Poorly installed insulation can lead to gaps and air leaks, diminishing effectiveness and lifespan.

    Maintenance Practices

    Regular checks and prompt repairs can significantly enhance the durability of insulation. Neglect can lead to various issues that may require complete replacement.

    Common Problems and Their Solutions Related to Rooftop Insulation

    Addressing common problems associated with rooftop insulation is essential for maintaining its performance. Here are typical issues and their corresponding solutions:

    • Moisture Accumulation: This often leads to mold and reduced insulation effectiveness. To solve this, ensure proper ventilation and address any roof leaks immediately.
    • Pest Infestations: Rodents and insects may compromise insulation materials. Regularly inspect for signs of pests and consider installing barriers or hiring pest control services as needed.
    • Thermal Bridging: This occurs when heat bypasses insulation through structural elements. To mitigate this issue, ensure that insulation is continuous and properly installed around all structural elements.
    • Deterioration of Materials: Over time, certain materials may degrade. Regular inspections can help identify deterioration early, allowing for timely repairs or replacements.